This example should be used as a reference to understand basic concepts and ideas on integrating with Relay Network. It should not be taken literally as this is how integration to Relay must be done. You should replace your record types, field names, business logic, etc. with those that match your business process and setup.
Example 2
This flow will cover the same logic as Example 1, but it’ll be more real-time will running as soon as a record is created or updated with certain conditions in Salesforce, meaning we will be using Record Triggered Messaging Flow.
Assumptions
The user’s data is stored in a PersonAccount/Contact record
The PersonAccountID/ContactID field will be used for the Relay CCID.
We have already created a custom checkbox field, HasBeenOnboardedToRelay__c, on the person account/Contact. This field is used to determine if the user has already been onboarded to Relay. So that it can be used as a filter criteria while extracting the eligible CCIDs for sent.
TCPA consent is stored in a Person Account/contact record in a custom field called HasConsentedToSMS c, so that it can be used as a filter criteria while extracting the eligible CCIDs/contacts for sent, or we can use the RelayConsent__c field by validating if it’s not STOP.
Flow Resources
Resource Name | Type | Description |
RelayMessageRequest |
| This resource will be populated with the details about the user to whom the message is supposed to be sent. |
RelayDynamicInput |
| In this example, we will be passing the case number and case reason (assigned to the contact/person Account on the case) as a dynamic input field to Relay. Since these dynamic input fields were not onboarded before and are going to be used with RelayMessagingRequest Apex action to trigger a message, passed will only pass field names, not the value. See Relay Dynamic Inputs |
RelayMessageRequest Collection |
| When passing different CCID and other required parameters to Relay, all the fields and records must be grouped into a collection. See RelayMessageRequest |
Flow Logic
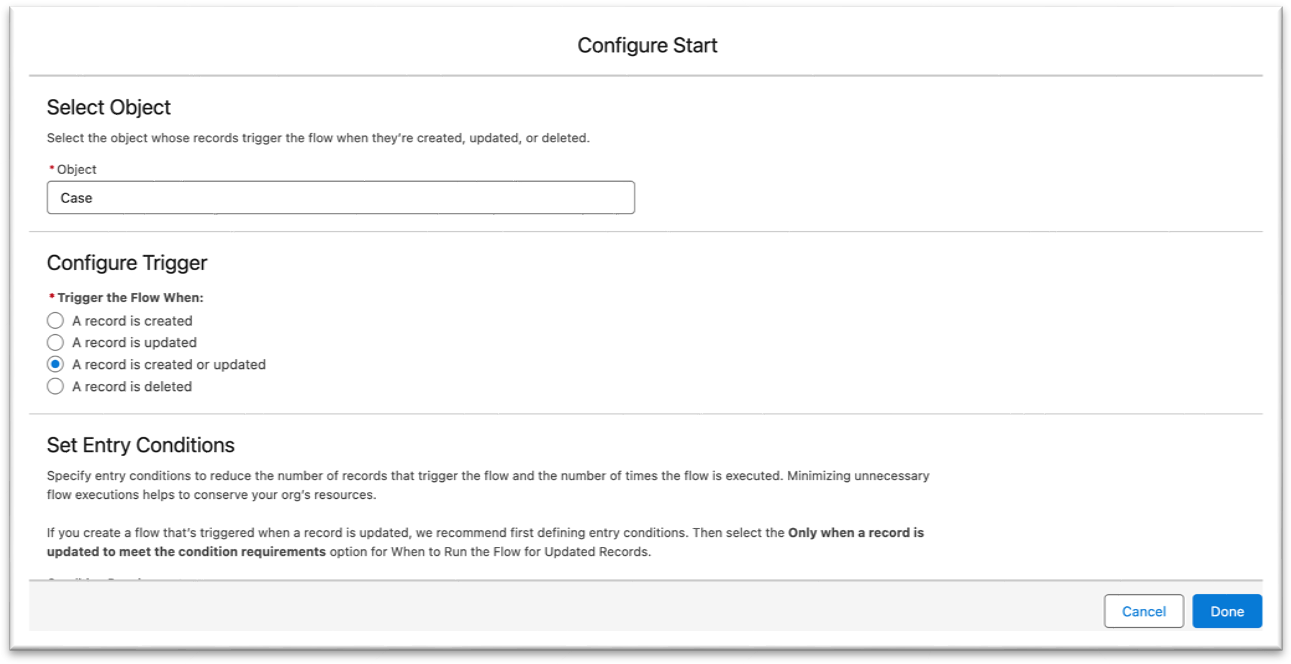
(1) Configure the Start Element
Create a Record-Triggered Flow.
Select the object Case
Configure Trigger as - Trigger the Flow When A record is created or updated.
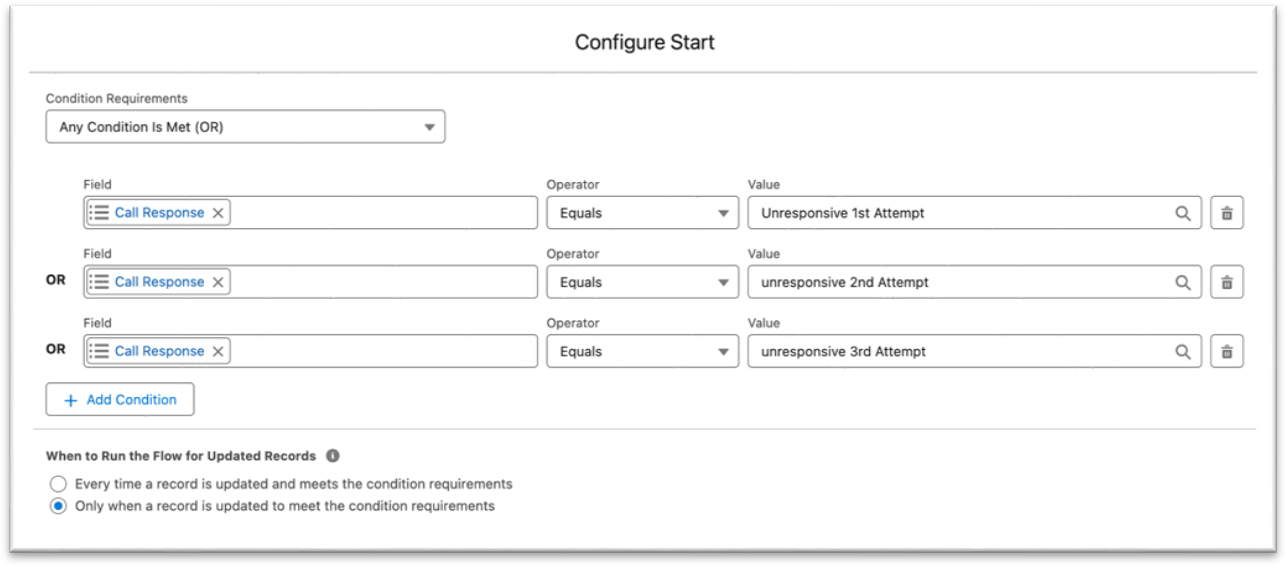
Set any specific Entry Conditions as per your business logic. For example, we can include the following conditions:
Ensure the SMS TCPA consent value is not Stop.
Ensure the PersonMobilePhone field is not null.
Including Call_Response c is either of these (‘Unresponsive 1st Attempt’, ‘Unresponsive 2nd Attempt’,’Unresponsive 3rd Attempt’) to send the customer follow-up message when calls are not being picked up by the customer.
When to Run the Flow for Updated Records - Only when a record is updated to meet the condition requirements
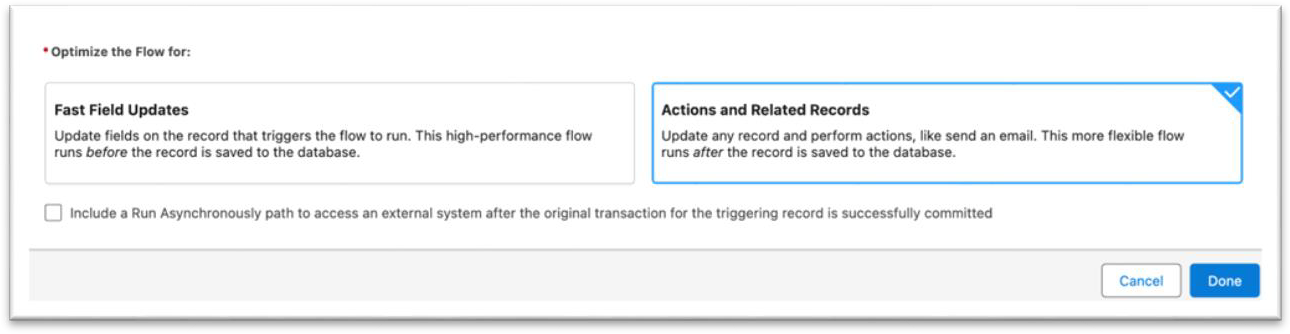
Optimize the Flow for - Actions and Related Records
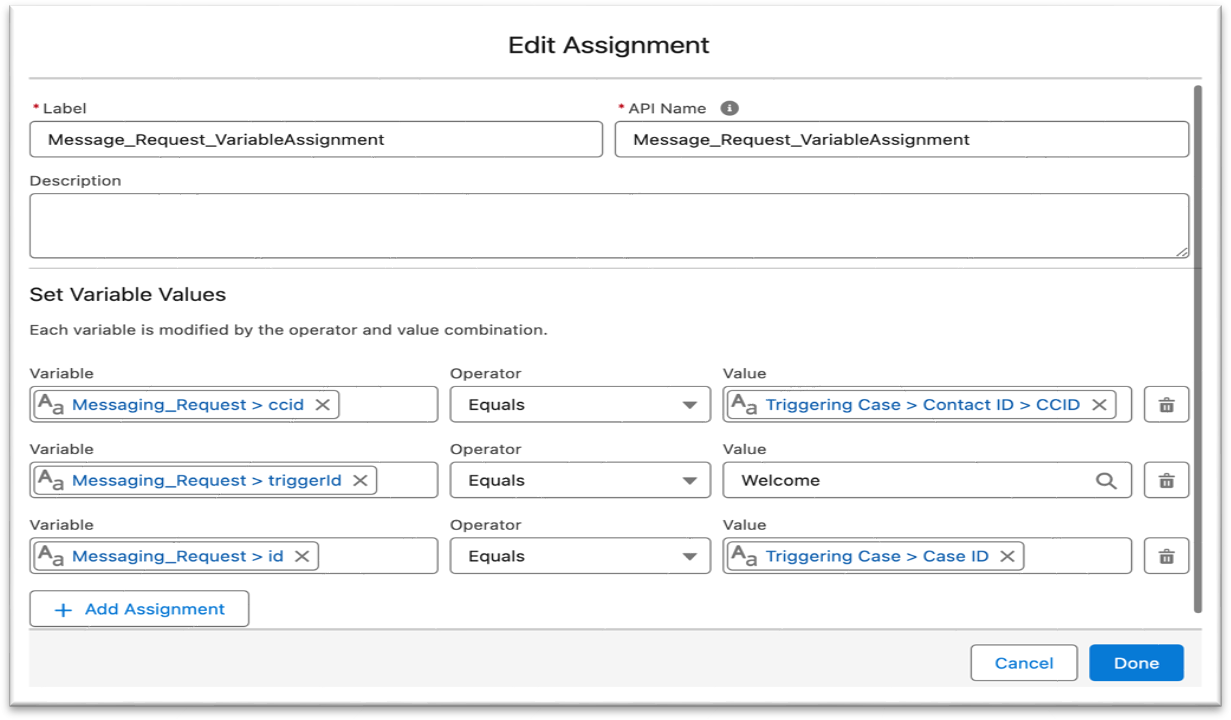
(2) Populate the Messaging Request Resource
Add an Assignment element to populate our MessagingRequest resource
Set the values for the MessagingRequest resource as follows:
{!RelayMessagingRequest.ccid} Equals {!$Record.Contact.CCID c}
{!RelayMessagingRequest.triggerId} Equals {TriggerID from CXB}
{!RelayMessagingRequest.id} → {!$Record.Id} {This one is required when using a dynamic input parameter in the message}
(3) Populate the input_field data and add fields to the Collection:
We will be adding a custom Input_ field to the Relay Messaging request. This Input_ field will contain the number of the case and the reason why the case was locked, The field value will be extracted and passed to relay along with other details to interpret the final message along with a dynamic parameter before being sent out to the end customer. Input resources are passed to the Relay Messaging Action as a collection. Therefore, for each Input_ field we want to send to Relay, we have to add it to a collection.
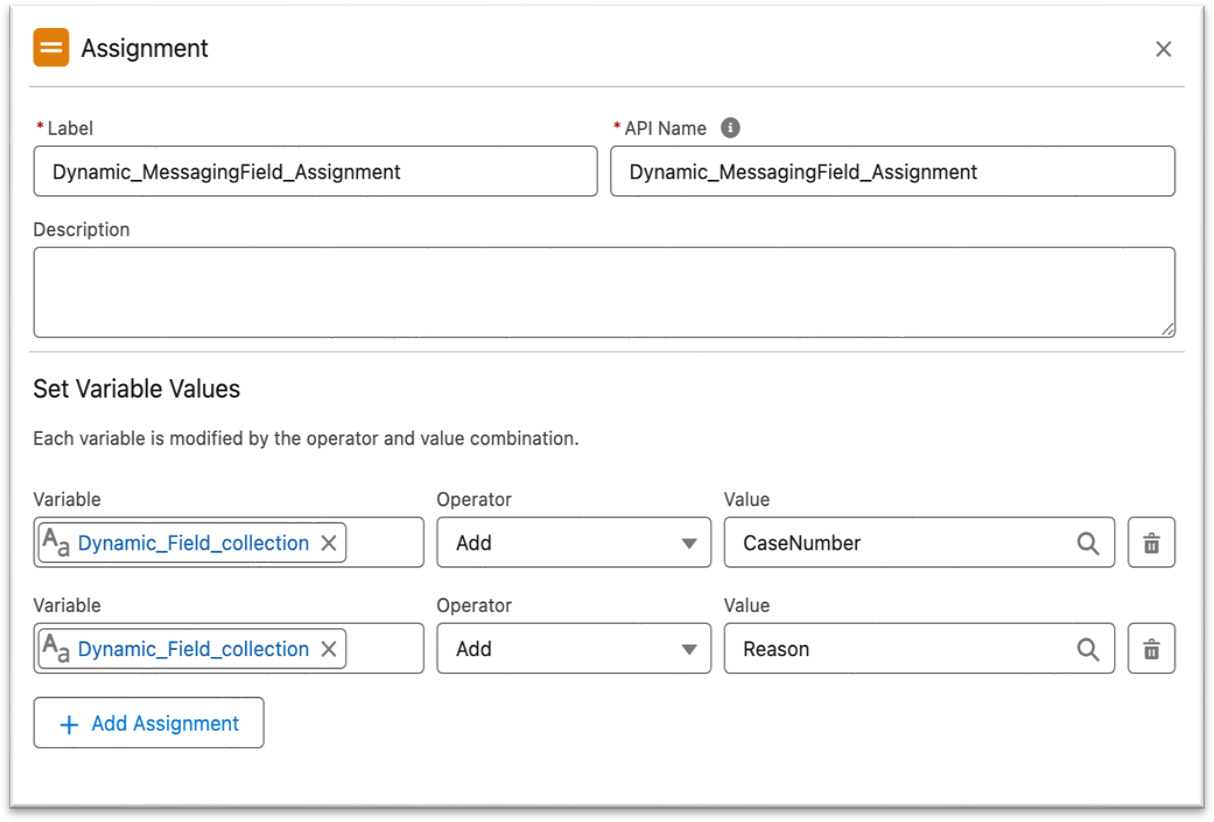
Add an Assignment element
Add the CaseNumber, Reason fields to the collection as:
{!Dynamic_Field_collection} Add CaseNumber
{!Dynamic_Field_collection} Add Reason
(4) Trigger the message from Relay:
Leverage the RelayMesaageRequest flow action to callout to Relay and Trigger the Message.
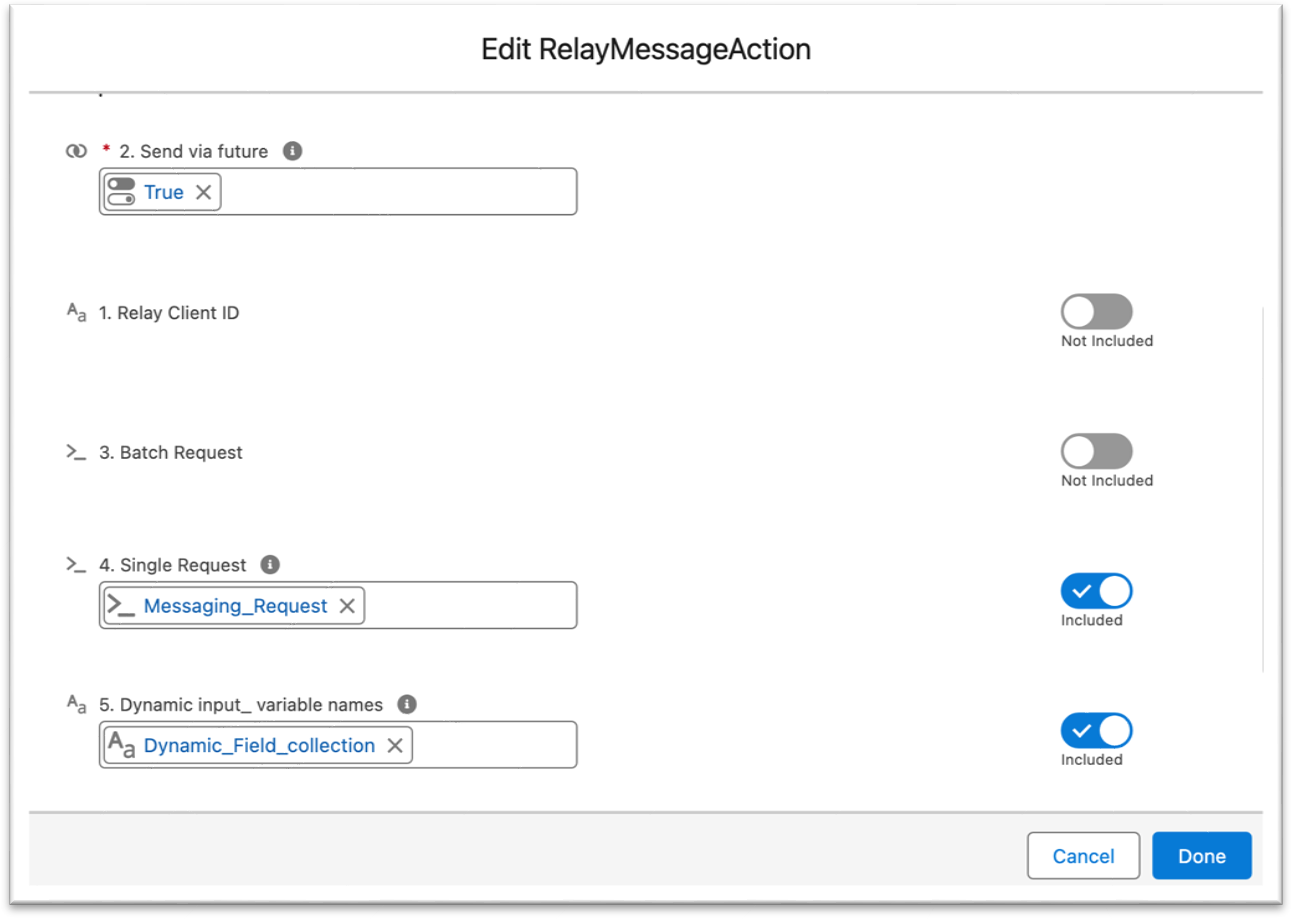
Add the Apex Action element and search/choose the RelayMessageAction.
Set the Single Request value to {!Messaging_Request}
Set the Dynamic input_variable Names to {!Dynamic_Field_collection}
Leave the TriggerID blank, as we have already added it to the assignment of the messaging request.
Turn the Send via Future ON by selecting the Value TRUE for better performance.
Flow
.png)