The Relay Package requires two permission sets. One permission set is designated for the Connected Application, while the other grants users access to the Relay LWC. You may be able to utilize existing permission sets provided they are updated to fulfill the requirements outlined in this article.
Relay Connected App Permission Set
IMPORTANT
Before creating the Relay Connected App permission set, make sure you have a Salesforce user that will be assigned to the permission set. This user does not require any UI logon capability. The user will be used to authenticate the connected app and will be the user identified as having created all of the Relay Events and Relay Powerups records.
This permission set is required by the Relay Connected App configuration. These permissions permits the Relay platform to insert records into the custom objects RelayEvents__c and RelayPowerups__c.
Create Relay Connected App Permission Set
Access your org’s Setup page.
Navigate to ADMINISTRATION → Users → Permission Sets.
Client the New button to create a new permission set.
Set the Label name to Relay Connected App.
Set the API Name to Relay_Connected_App.
Click Save.
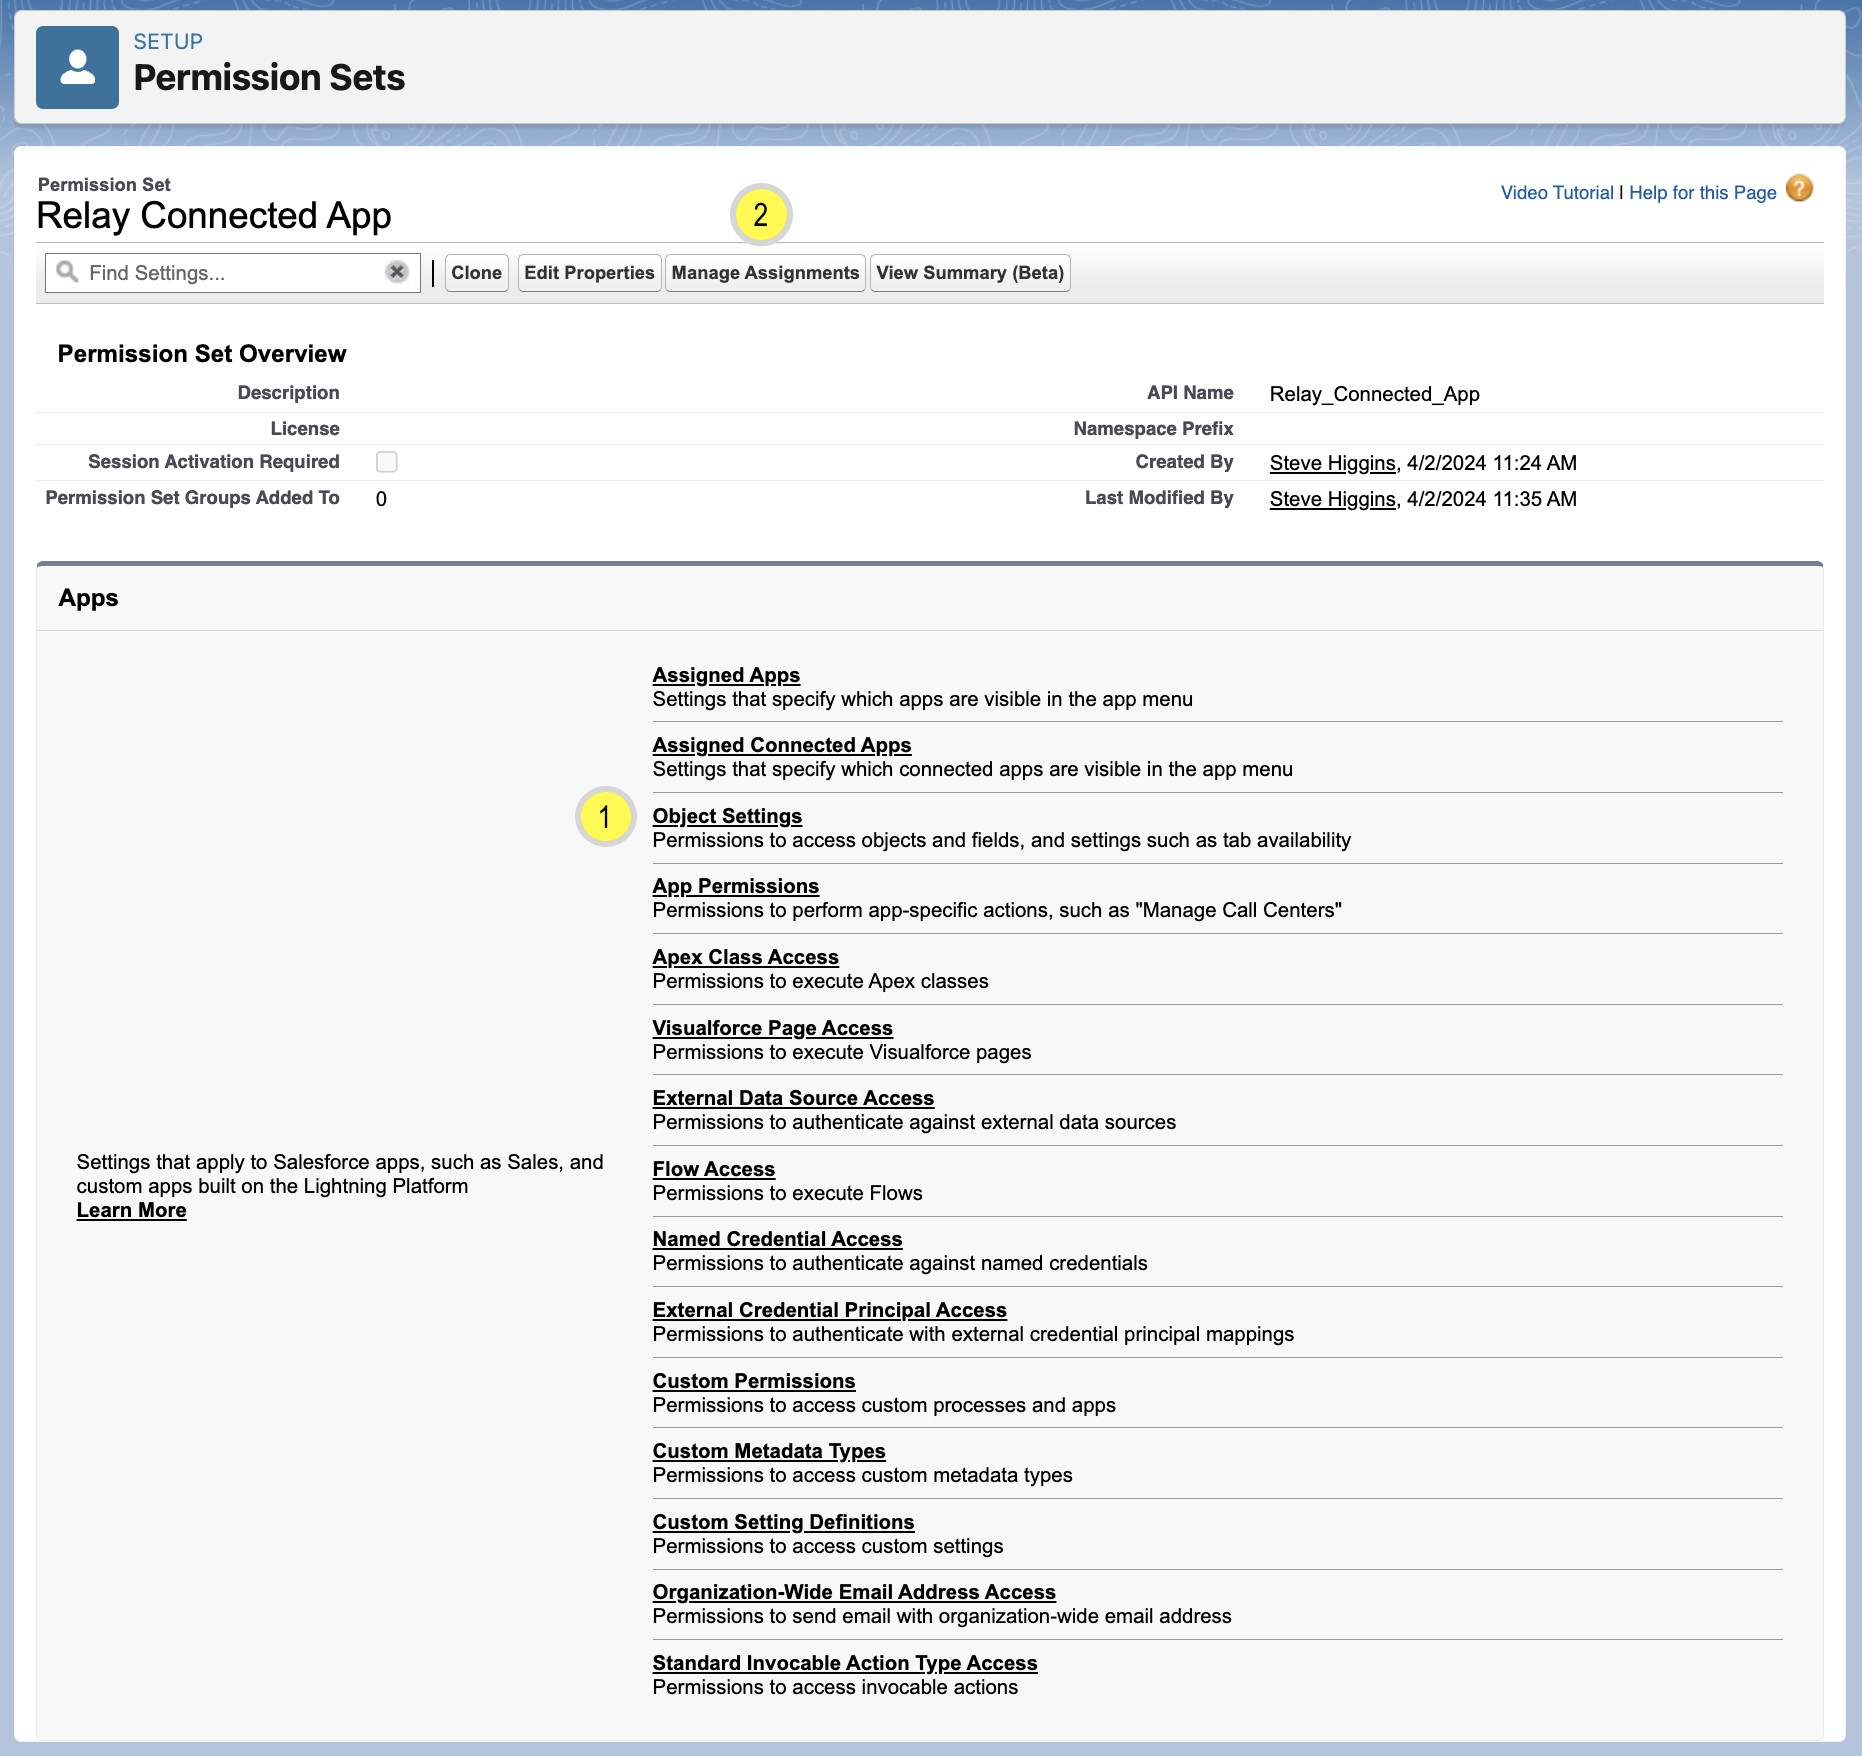
Fig 1.
Edit Permission Set
If you just created the Permission Set, you should already be viewing its settings. If not, navigate to the Permission Sets, locate the Relay Connected App permission set and click on it.
Edit - Object Settings
Under the Apps section, click on the Object Settings (Fig 1-1) link.
Scroll down and locate the Relay Events object can click on it.
Click the Edit button.
Ensure that the Object Permissions of Read and Create are Enabled.
Ensure that the Field Permissions have enabled Read and Edit Access for all the fields.
Click the Save button.
Click on the Object Settings breadcrumb to return back to the Object Settings page.
Scroll down and locate the Relay Powerups object and click on it.
Ensure that the Object Permissions of Read and Write are Enabled.
Ensure that the Field Permissions have enabled Read Access for all the fields.
Click the Save button.
Click on the Permission Set Overview breadcrumb to return back to main permission set overview page for the Relay Connected App permission set.
Edit - Manage Assignments
Click on the Manage Assignments (Fig 1-2) button.
Click on the Add Assignment button.
Locate the desired Connected App user and select it (check the box).
Click the Next button.
Click the Assign button.
Click on the PERMISSION SET 'RELAY CONNECTED APP' breadcrumb link.
IMPORTANT
Provide your Relay Implementation Manager the Salesforce username (not the email address) you assigned to the permission set. This value is required to configure the Relay Push API.
Relay LWC Permission Set
IMPORTANT
You must create a new LWC permission set. While you can use the included RelayLWC permission as a template, if you make any change to pre-packaged permission set those changes will be overwritten during your next Relay package upgrade.
This permission set controls access to the Relay LWC. The following users should be assigned to this permission set:
Any Salesforce user who requires access to the Relay LWC.
Any user who might invoke a flow, directly or indirectly, that includes any Relay flow actions.
If you have any scheduled flows that includes a Relay action, then the default flow user will need access to this permission set.
Create Relay LWC Permission Set
Access your org’s Setup page.
Navigate to ADMINISTRATION → Users → Permission Sets.
Client the New button to create a new permission set.
Set the Label name to Relay LWC Access.
Set the API Name to Relay_LWC_Access.
Set the License option to -None-.
Click Save.
Edit Relay LWC Access Permission Set
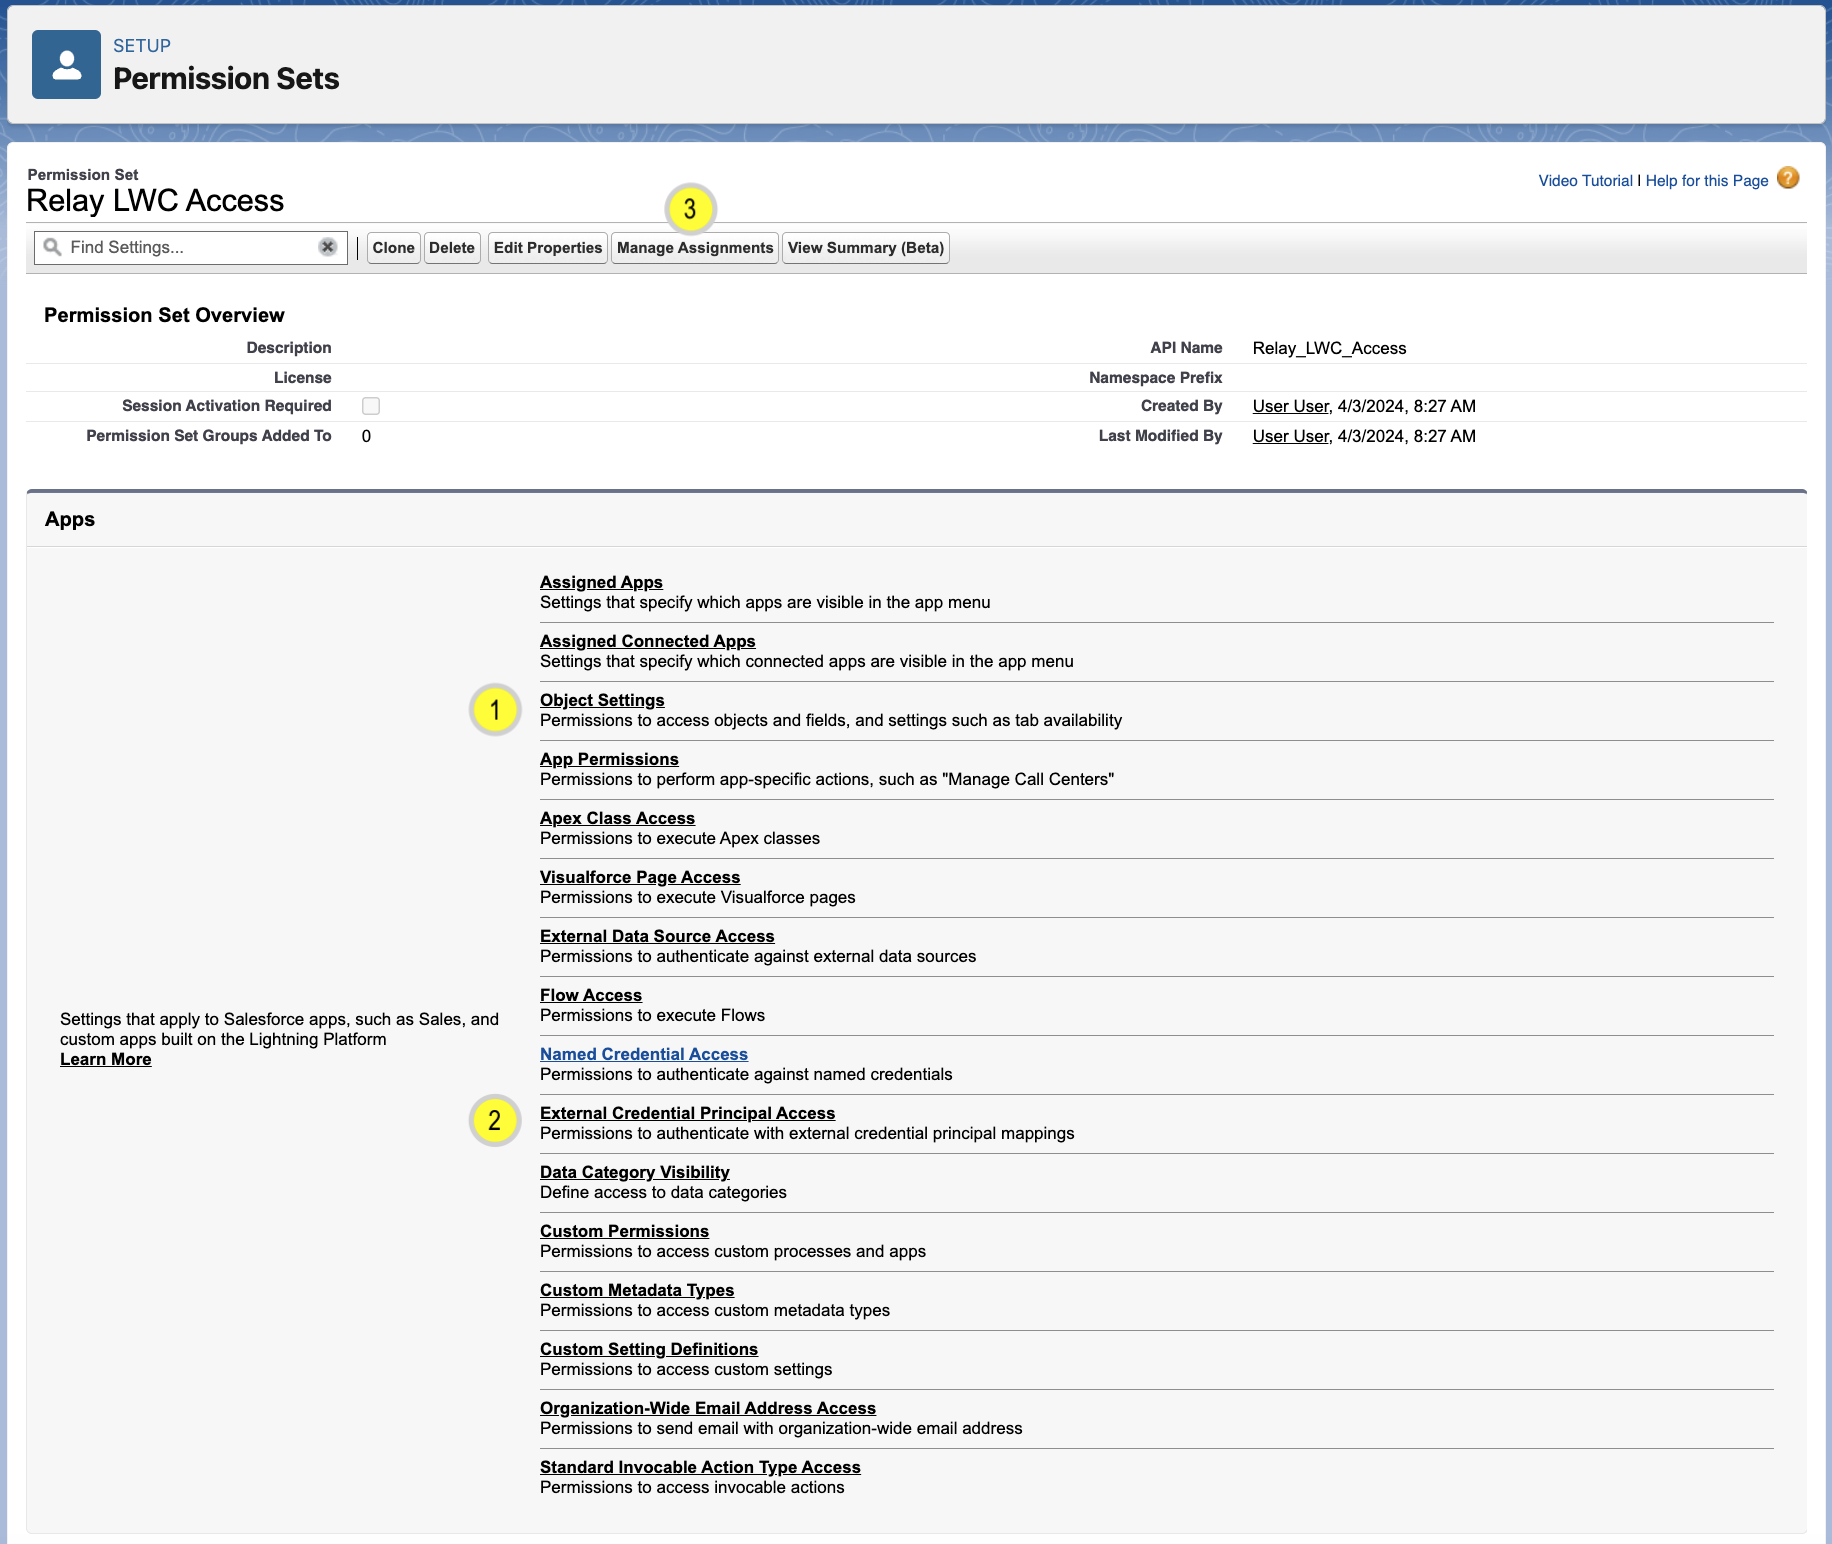
Fig 2.
Edit - Object Settings
Under the Apps section, click on the Object Settings (Fig 2-1) link.
Scroll down and locate the Relay Events object can click on it.
Click the Edit button.
Ensure that the Object Permissions of Read and Create are Enabled.
Ensure that the Field Permissions have enabled Read and Edit Access for all the fields.
Click the Save button.
Click on the Permission Set Overview bread crumb link to return back to the Relay LWC Access permission set overview page.
Edit - External Credential Principal Access
Under the Apps section, click the External Credential Principal Access (Fig 2-2) link. You will be presented with Fig 3.

Fig 3.
Verify that the RelayNetworkPrincipal is assigned (Fig 3-1). If not continue with step 3.
Click the Edit button (Fig 3-2)
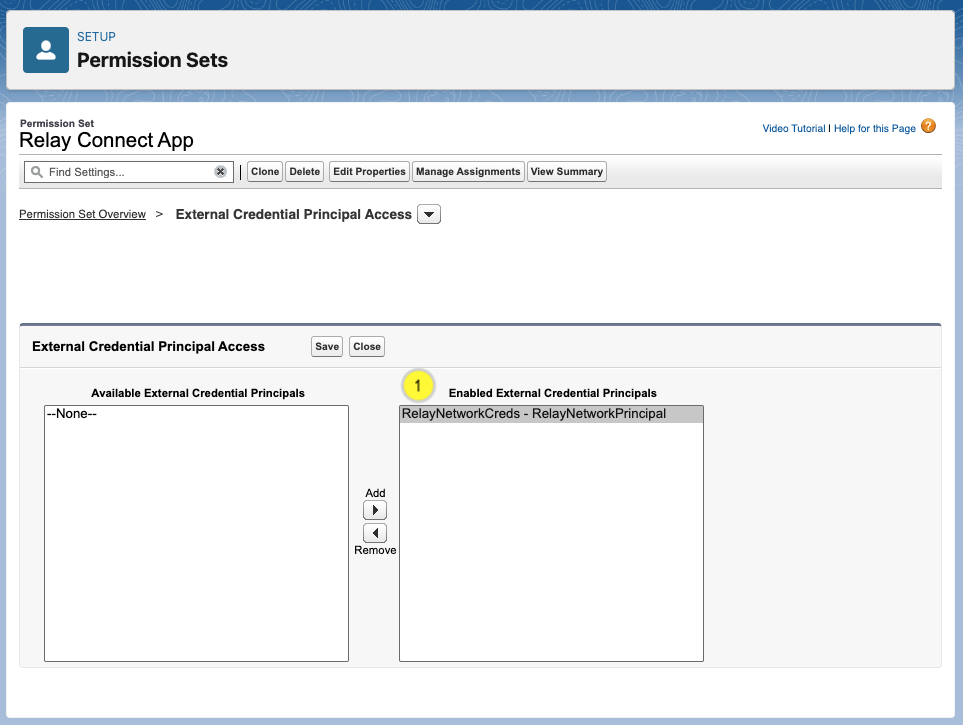
Fig 4.
In the Available External Credential Principals list, locate the RelayNetworkCreds - RelayNetworkPrincipal and Add it to the Enabled External Credential Principals list (Fig 4-1.
Click the Save button.
Click on the Permission Set Overview (Fig 3-3) bread crumb link to return back the Relay LWC Access permission set overview page.
Manage Assignments
IMPORTANT
Make sure you assign all users that require access to the Relay LWC to this permission set.
Click on the Manage Assignments (Fig 2-3) button.
Click on the Add Assignment button.
Locate the desired user and select it (check the box).
Click the Next button.
Click the Assign button.
Click on the PERMISSION SET RELAY LWC ACCESS breadcrumb link.