To establish a connection between the Relay Salesforce package and the Relay Network platform, configuration of an External Credential and Named Credential is necessary.
Create Relay External Credential
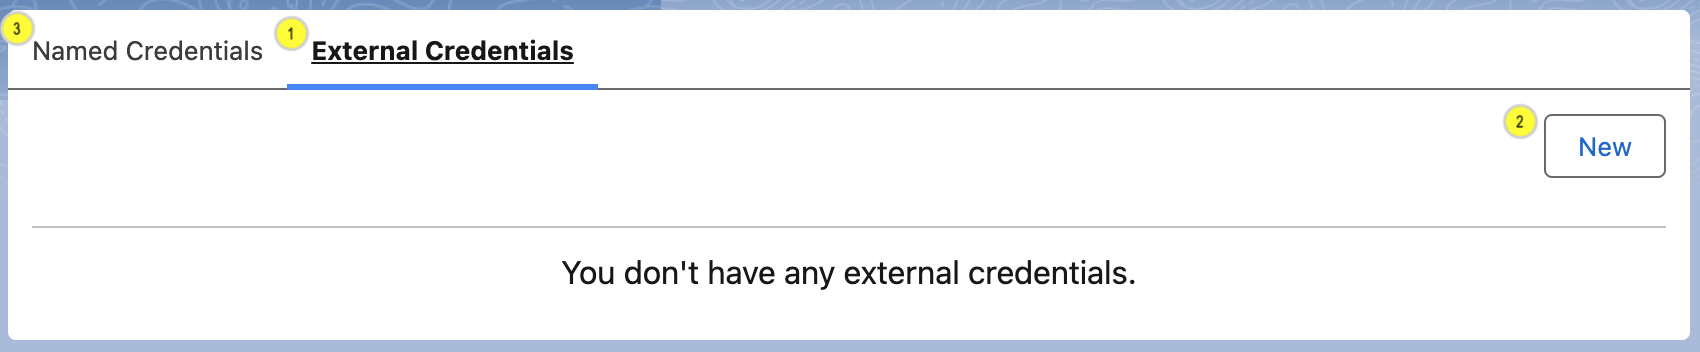
Fig 1.
Access your org’s Setup page.
Navigate to SETTINGS → Security → Named Credentials
Click on the External Credentials (Fig 1-1) tab
Click the New (Fig 1-2) button
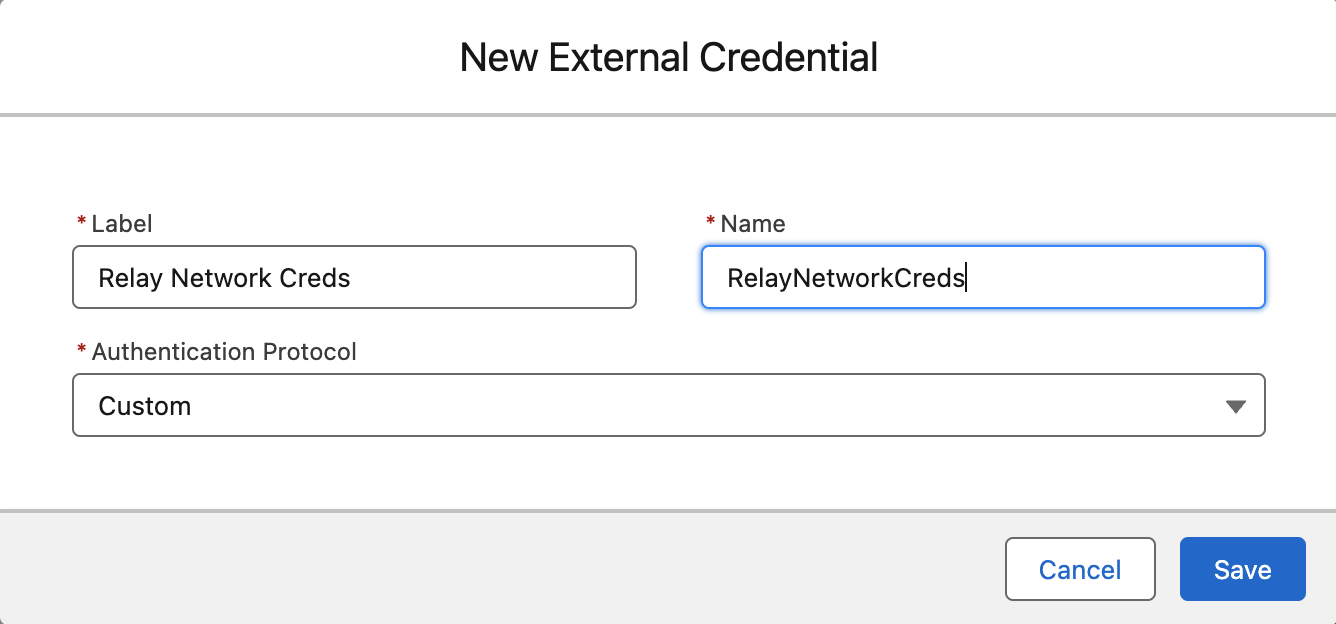
Fig 2.
Fill in the New External Credential Dialog as follows
Set the Label field to Relay Network Creds.
Set the Name field to RelayNetworkCreds. This value will be used later so it is important to enter it exactly as is.
Set the Authentication Protocol to Custom.
Click the Save button.
The Relay Network Creds Network Credentials dialog will appear (Fig 3).

Fig 3.
Locate the Principals section and click the New button (Fig 3-1) to open the Create Principal dialog
CAUTION
If you ever change the name of the Principal you will have to update your permission set accordingly.
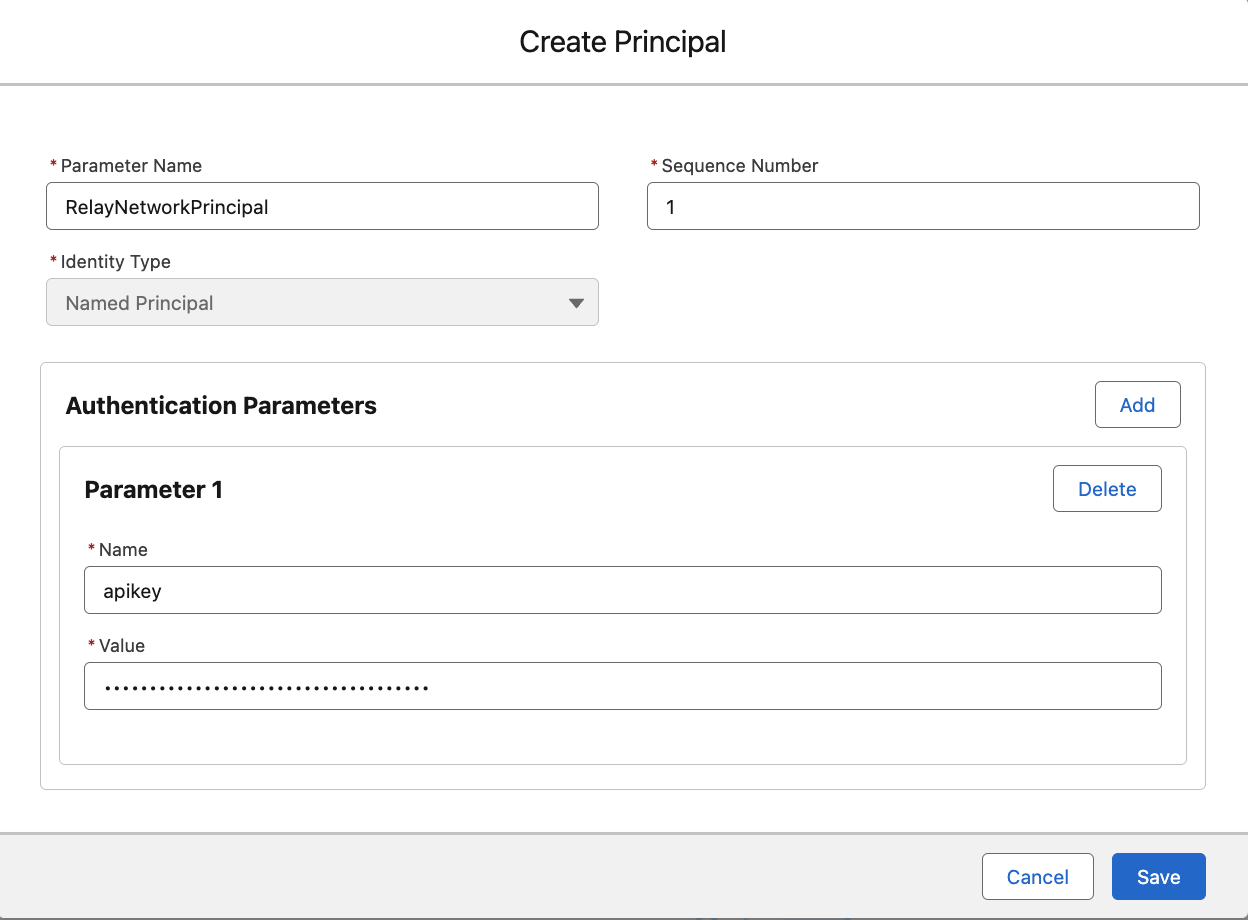
Fig 4.
Fill in the Create Principal Dialog
Set the Parameter Name field to RelayNetworkPrincipal.
Keep the Sequence Number as 1.
Click the Add button next to Authentication Parameters.
Set the Parameter 1 Name to apikey. This value will be used later so make sure it is entered exactly as stated without spaces.
Set the Parameter 1 Value to the Relay API Key. This value will be provided to you by your Relay Implementation Manager.
Click the Save button.
Locate the Custom Headers section and click on the New button (Fig 3-2)
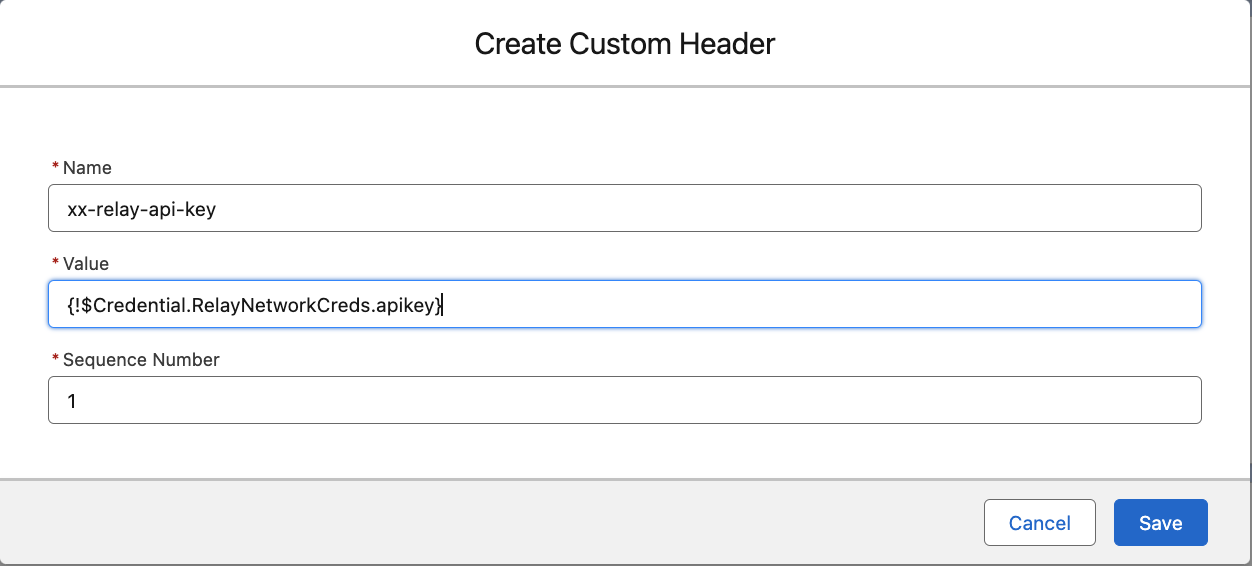
Fig 5.
Fill in the Create Custom Header dialog (Fig 5.)
Set the Name field to xx-relay-api-key. As this is an HTTP header name, the value must be exactly as specified.
Set the Value field to {!$Credential.RelayNetworkCreds.apikey}. The RelayNetworkCreds value refers to the value entered in Step 5b. Fig 3. (3). The apikey value is from Step 11d.
Leave the Sequence Number value 1.
Click the Save button
Create Relay Names Credential
Click on the Named Credentials tab (Fig 1-3)
Click on the New button to create a new Named Credential
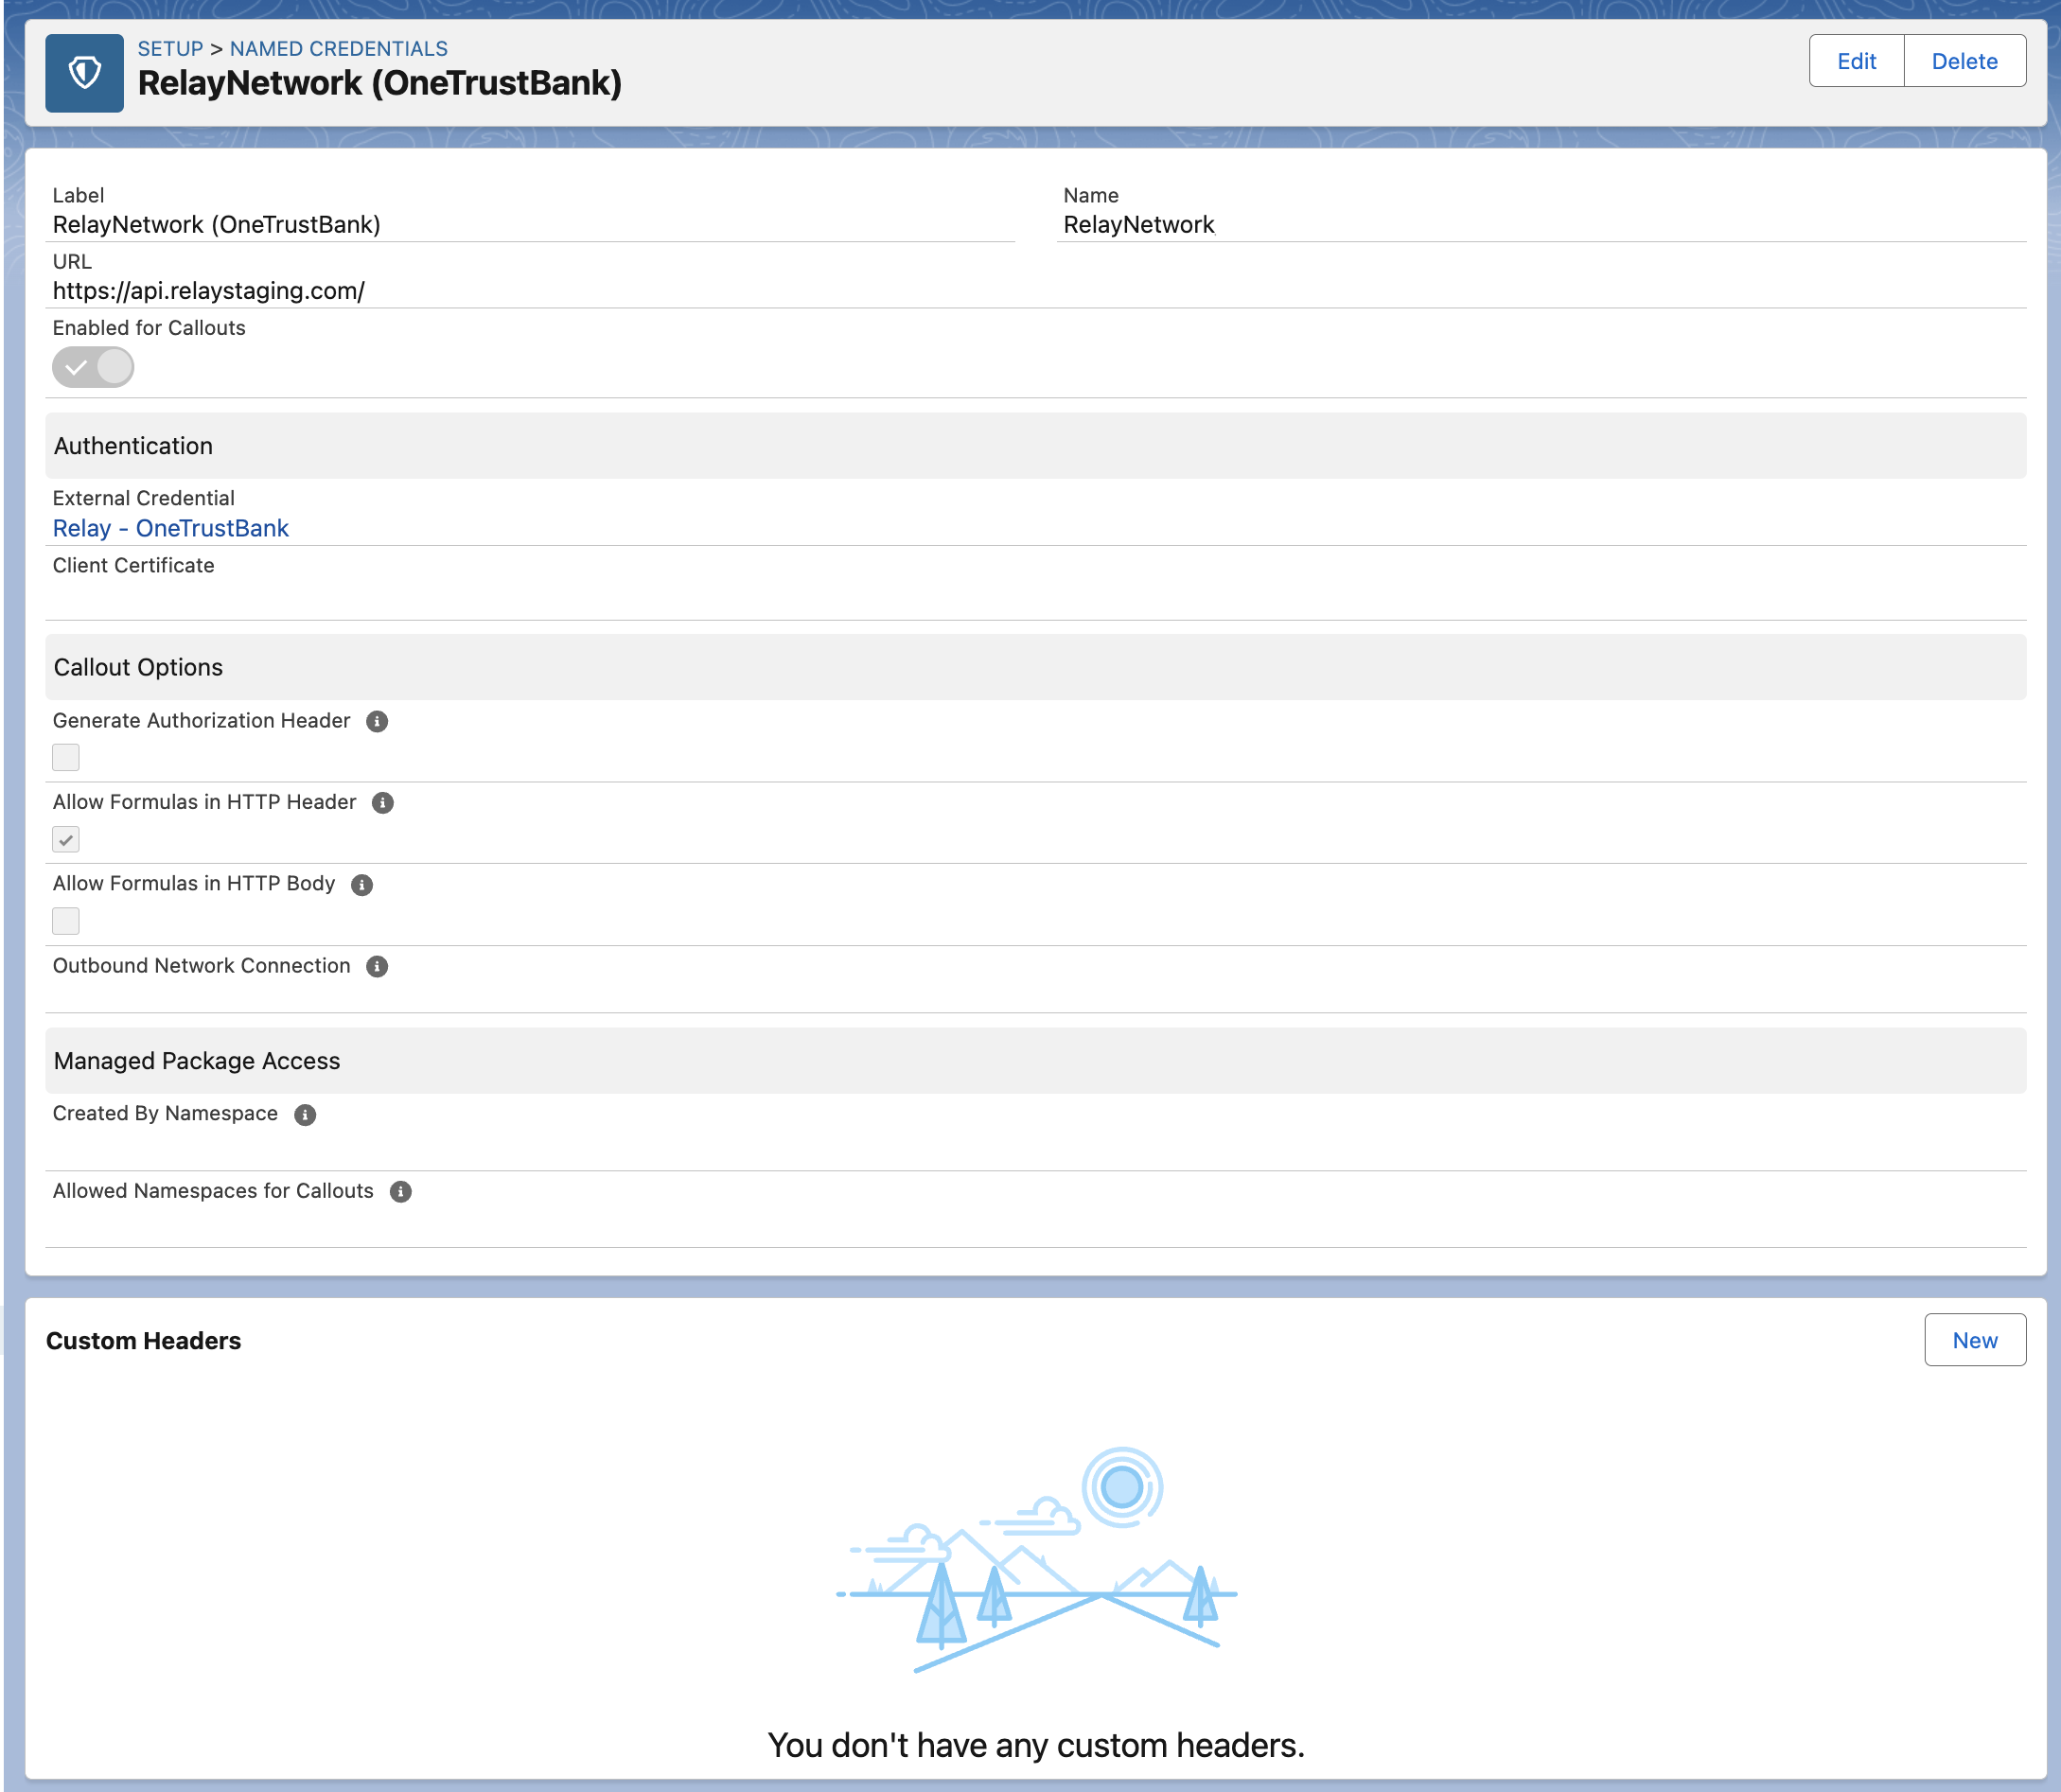
Fig 6.
Fill in the New Named Credential form (Fig 6.) as follows:
Set the Label field to Relay Network, although it could be anything.
It is critical that you enter the Name field exactly as specified →
For single client configuration (default) → Set the Name field to RelayNetwork
For a multi-client configuration → Set the Name field to RelayNetwork_{client_id}, where {client_id} is your Client ID provided by Relay. For example, if your client id is onetrustbank2024 then the Name field must be set to RelayNetwork_onetrustbank2024.
Set the URL to one of the following values:
For Relay Staging Environment → Set the URL to https://api.relaystaging.com
For the Relay Production environment → Set the URL to https://api.relayzone.com
Set the Enabled for Callout field to Enabled.
Authentication Section
For the External Credentials select Relay Network Creds. This was created in Step 5.
Leave the Client Certificate blank.
Callout Options Section
Uncheck Generate Authorization Header
Check Allow Formulas in HTTP Header
Uncheck Allow Formulas in HTTP Body
Leave Outbound Network Connection as —None—
Managed Package Access Section
Set the Allowed Namespaces for Callouts to RelaySF. (Note: For the unmanaged packaged this can be left blank).
Click the Save button.
Your named credentials are now configured. The next step is to configure the Permission Sets.
CAUTION - Breaking Change!
Starting with package version 2.27, the Named Credential Name property must include the Relay Client Id. See 11.b
To establish a connection between the Relay Salesforce package and the Relay Network platform, configuration of an External Credential and Named Credential is necessary.
Create Relay External Credential
Fig 1.
Access your org’s Setup page.
Navigate to SETTINGS → Security → Named Credentials
Click on the External Credentials (Fig 1-1) tab
Click the New (Fig 1-2) button
Fig 2.
Fill in the New External Credential Dialog as follows
Set the Label field to Relay Network Creds.
Set the Name field to RelayNetworkCreds. This value will be used later so it is important to enter it exactly as is.
Set the Authentication Protocol to Custom.
Click the Save button.
The Relay Network Creds Network Credentials dialog will appear (Fig 3).
Fig 3.
Locate the Principals section and click the New button (Fig 3-1) to open the Create Principal dialog
CAUTION
If you ever change the name of the Principal you will have to update your permission set accordingly.
Fig 4.
Fill in the Create Principal Dialog
Set the Parameter Name field to RelayNetworkPrincipal.
Keep the Sequence Number as 1.
Click the Add button next to Authentication Parameters.
Set the Parameter 1 Name to apikey. This value will be used later so make sure it is entered exactly as stated without spaces.
Set the Parameter 1 Value to the Relay API Key. This value will be provided to you by your Relay Implementation Manager.
Click the Save button.
Locate the Custom Headers section and click on the New button (Fig 3-2)
Fig 5.
Fill in the Create Custom Header dialog (Fig 5.)
Set the Name field to xx-relay-api-key. As this is an HTTP header name, the value must be exactly as specified.
Set the Value field to {!$Credential.RelayNetworkCreds.apikey}. The RelayNetworkCreds value refers to the value entered in Step 5b. Fig 3. (3). The apikey value is from Step 11d.
Leave the Sequence Number value 1.
Click the Save button
Create Relay Names Credential
Click on the Named Credentials tab (Fig 1-3)
Click on the New button to create a new Named Credential
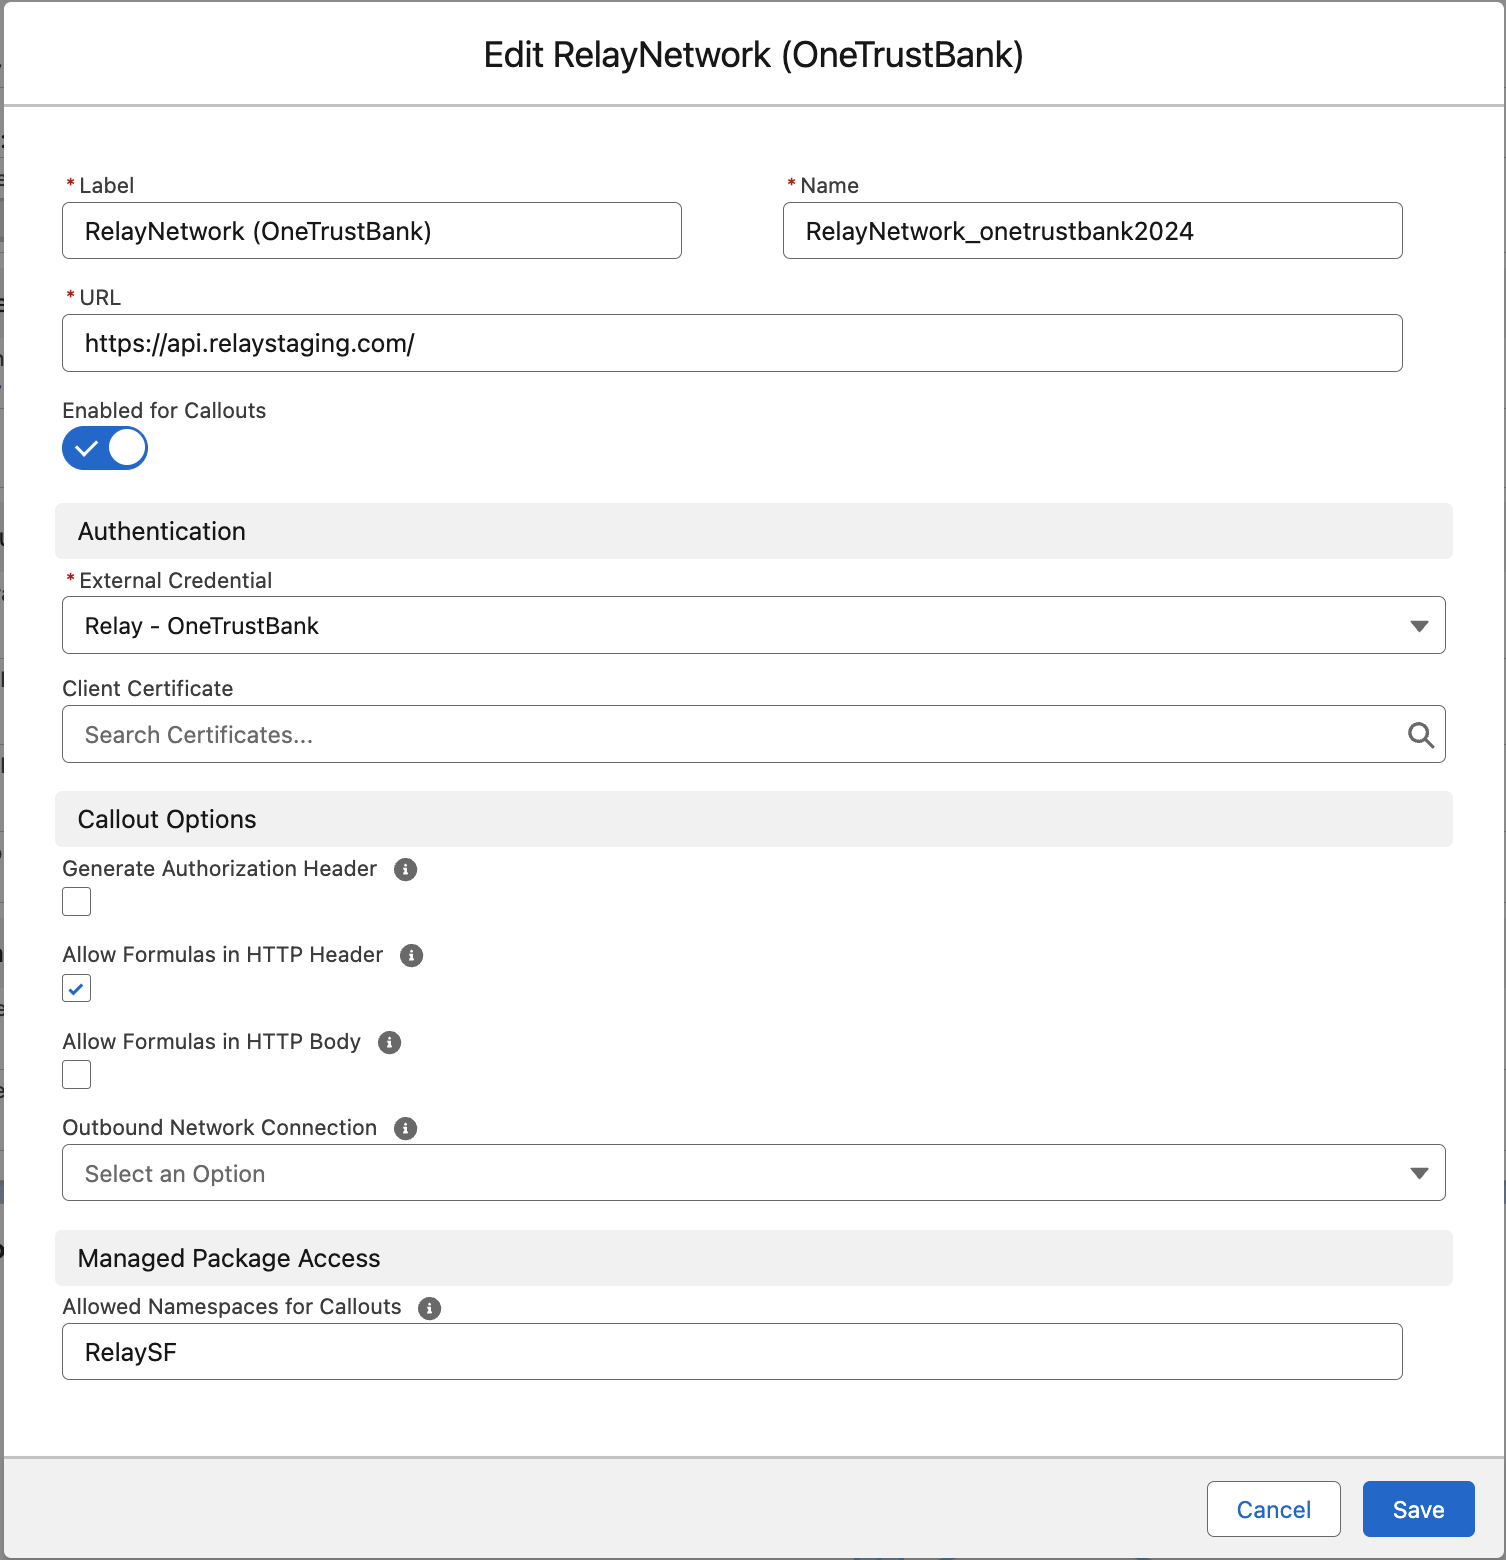
Fig 6.
Fill in the New Named Credential form (Fig 6.) as follows:
Set the Label field to Relay Network, although it could be anything.
It is critical that you enter the Name field exactly as specified → Set the Name field to RelayNetwork_{client_id}, where {client_id} is your Client ID provided by Relay. For example, if your client id is onetrustbank2024 then the Name field must be set to RelayNetwork_onetrustbank2024.
Set the URL to one of the following values:
For Relay Staging Environment set the URL to https://api.relaystaging.com
For the Relay Production environment set the URL to https://api.relayzone.com
Set the Enabled for Callout field to Enabled.
Authentication Section
For the External Credentials select Relay Network Creds. This was created in Step 5.
Leave the Client Certificate blank.
Callout Options Section
Uncheck Generate Authorization Header
Check Allow Formulas in HTTP Header
Uncheck Allow Formulas in HTTP Body
Leave Outbound Network Connection as —None—
Managed Package Access Section
Set the Allowed Namespaces for Callouts to RelaySF. (Note: For the unmanaged packaged this can be left blank).
Click the Save button.
Your named credentials are now configured. The next step is to configure the Permission Sets.