IMPORTANT
You must have the proper permissions to edit Salesforce pages.
You must have configured a Connected App to Relay in order for the message status values to be displayed.
The Relay Message List LWC can be placed on any record page that supports editing the page layout.
Adding the Relay LWC to a Page
Go to the record page you want to place the Relay component. In this example we will be adding the component to the Case record page.
Click the gear (Fig. 1-1) and select Edit Page (Fig 1-2).
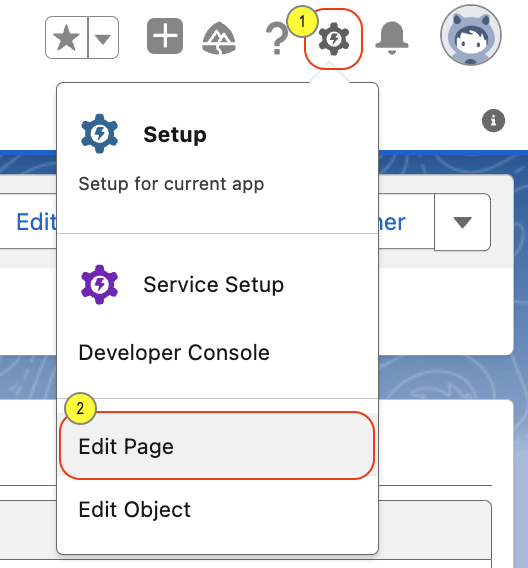
Fig. 1 - Edit Page Layout
Locate the Relay Message List component under the Custom section (Fig. 2-4)
Drag the component to your desired location (Fig. 2-5). In this example we are dragging the component to a new tab, Relay Network, that was created on the case record (Fig. 2-6).
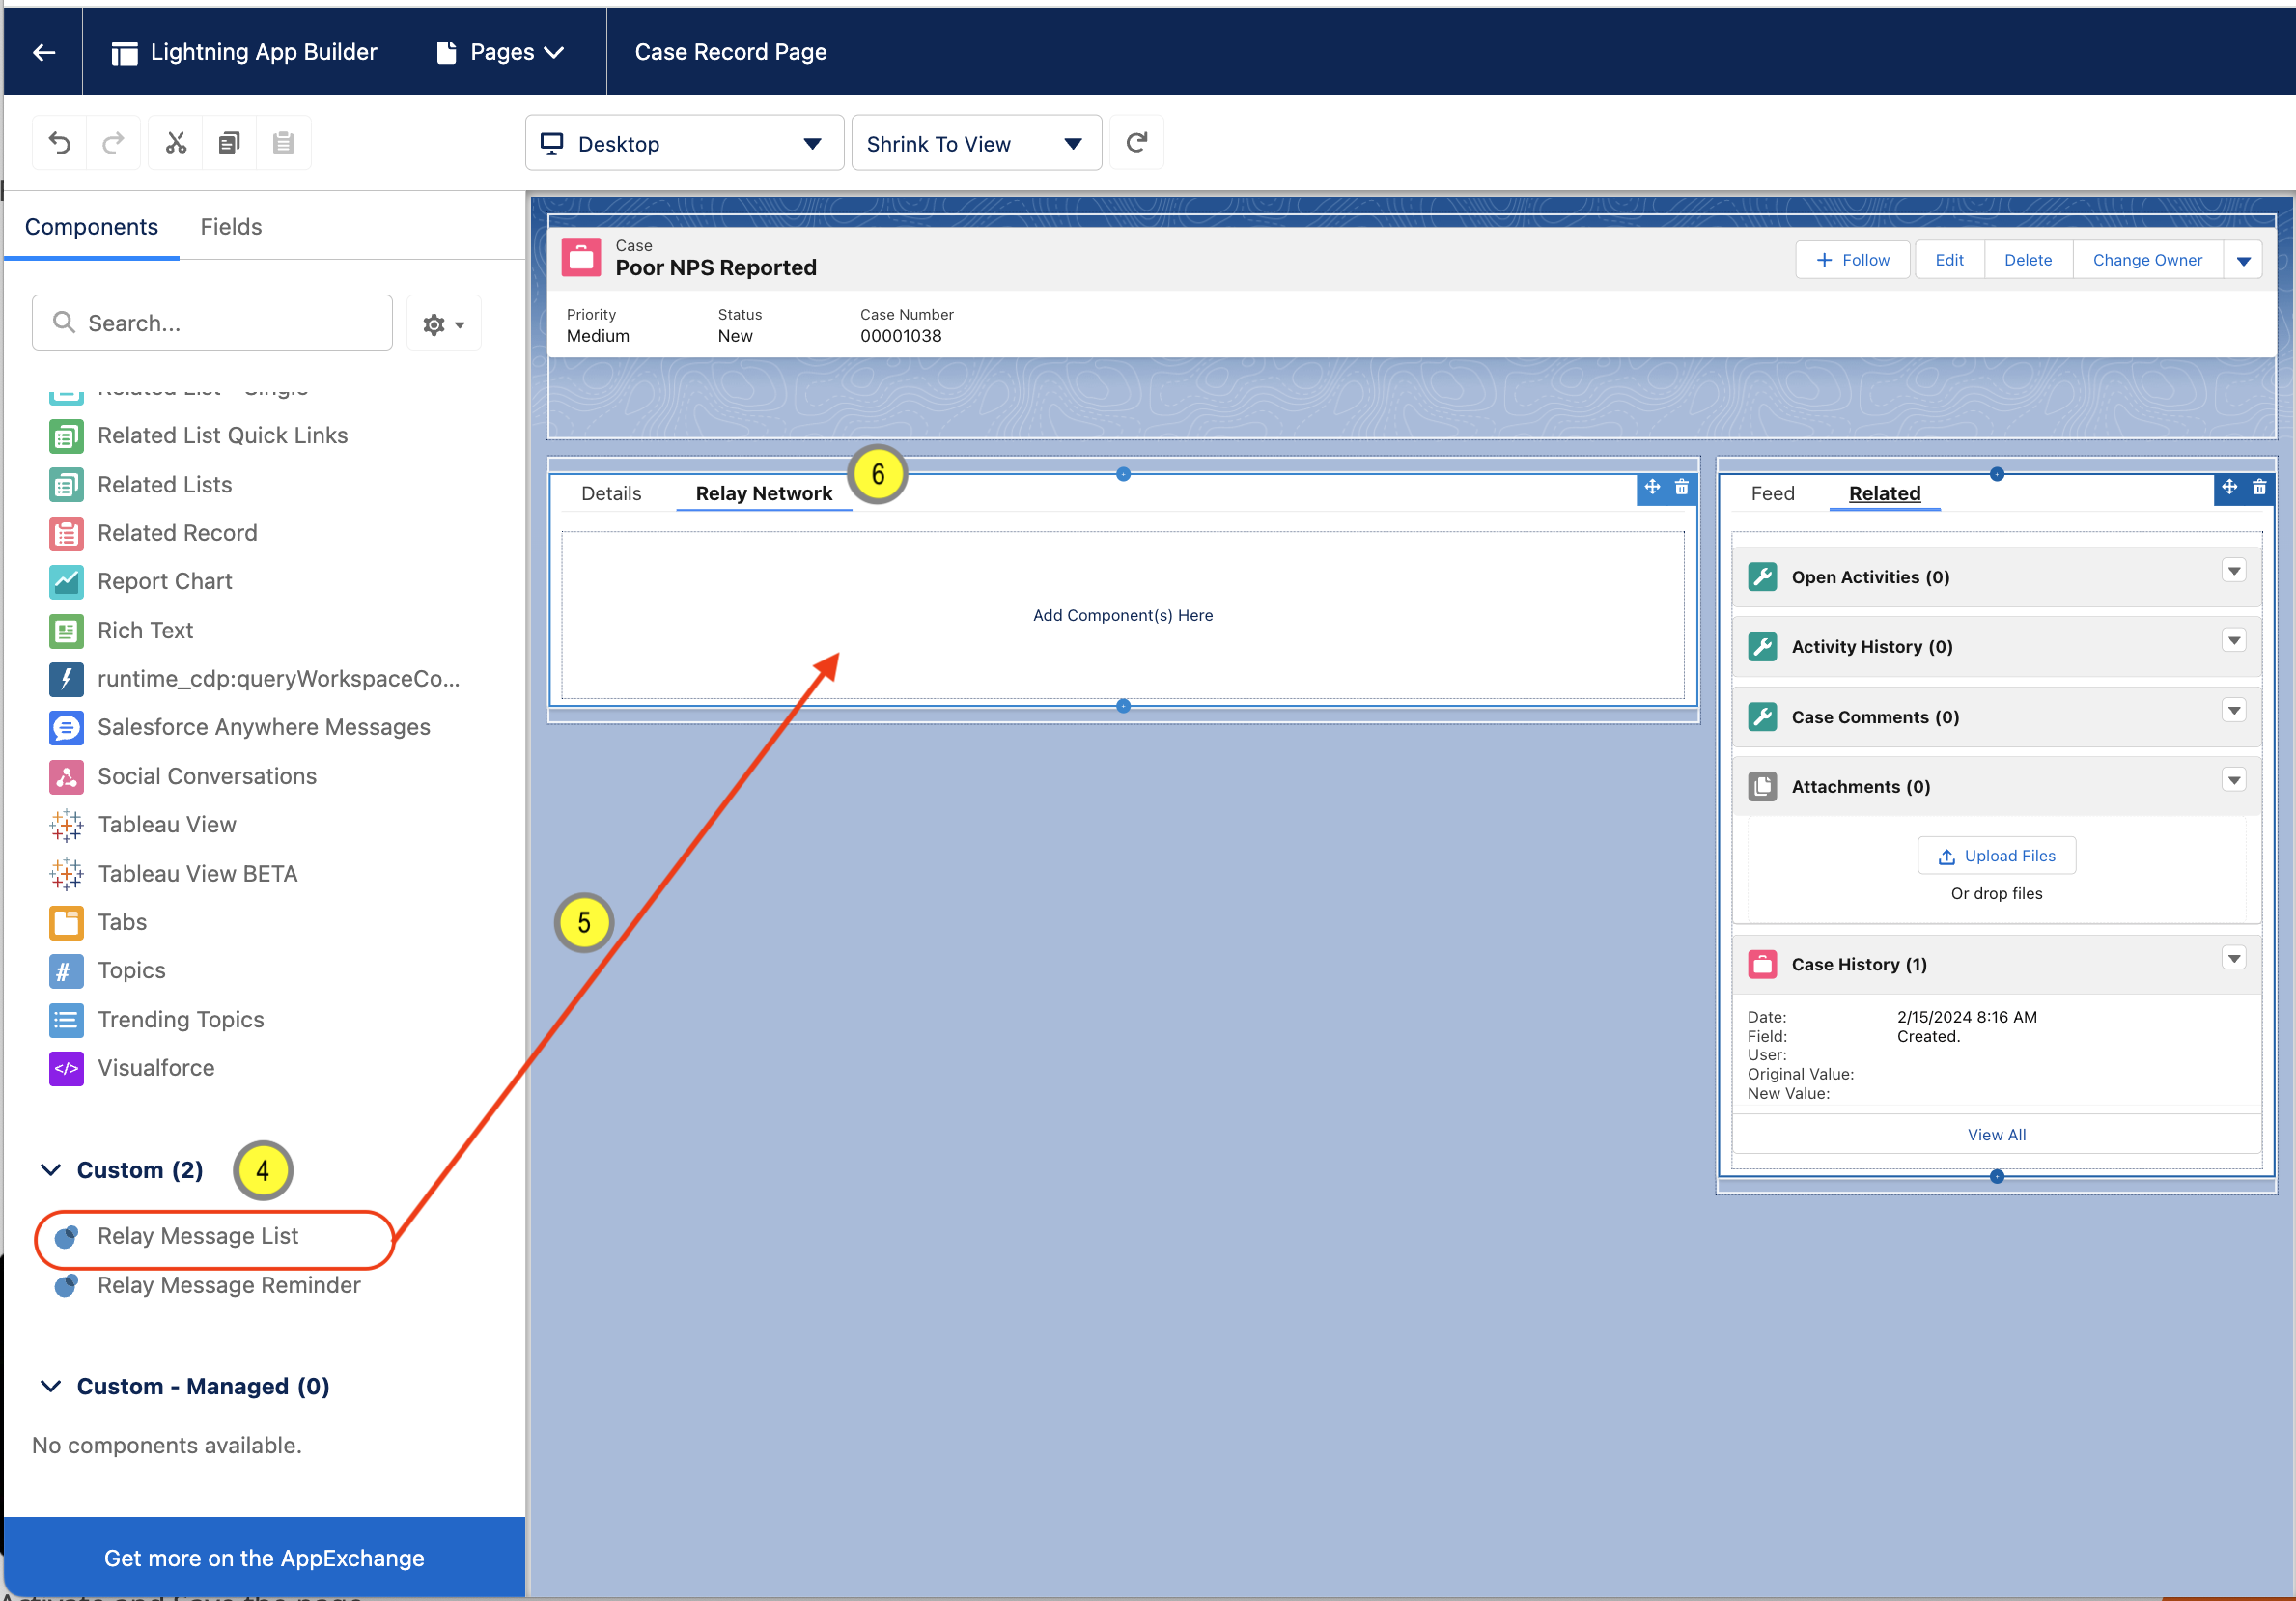
Fig. 2 - Page Builder
Once the Relay component has been added to the page layout, click on it to open its property editor. The property editor will be opened on the right side of the window. See the next section for a complete description of all the component’s properties.
Relay Message List Component Elements
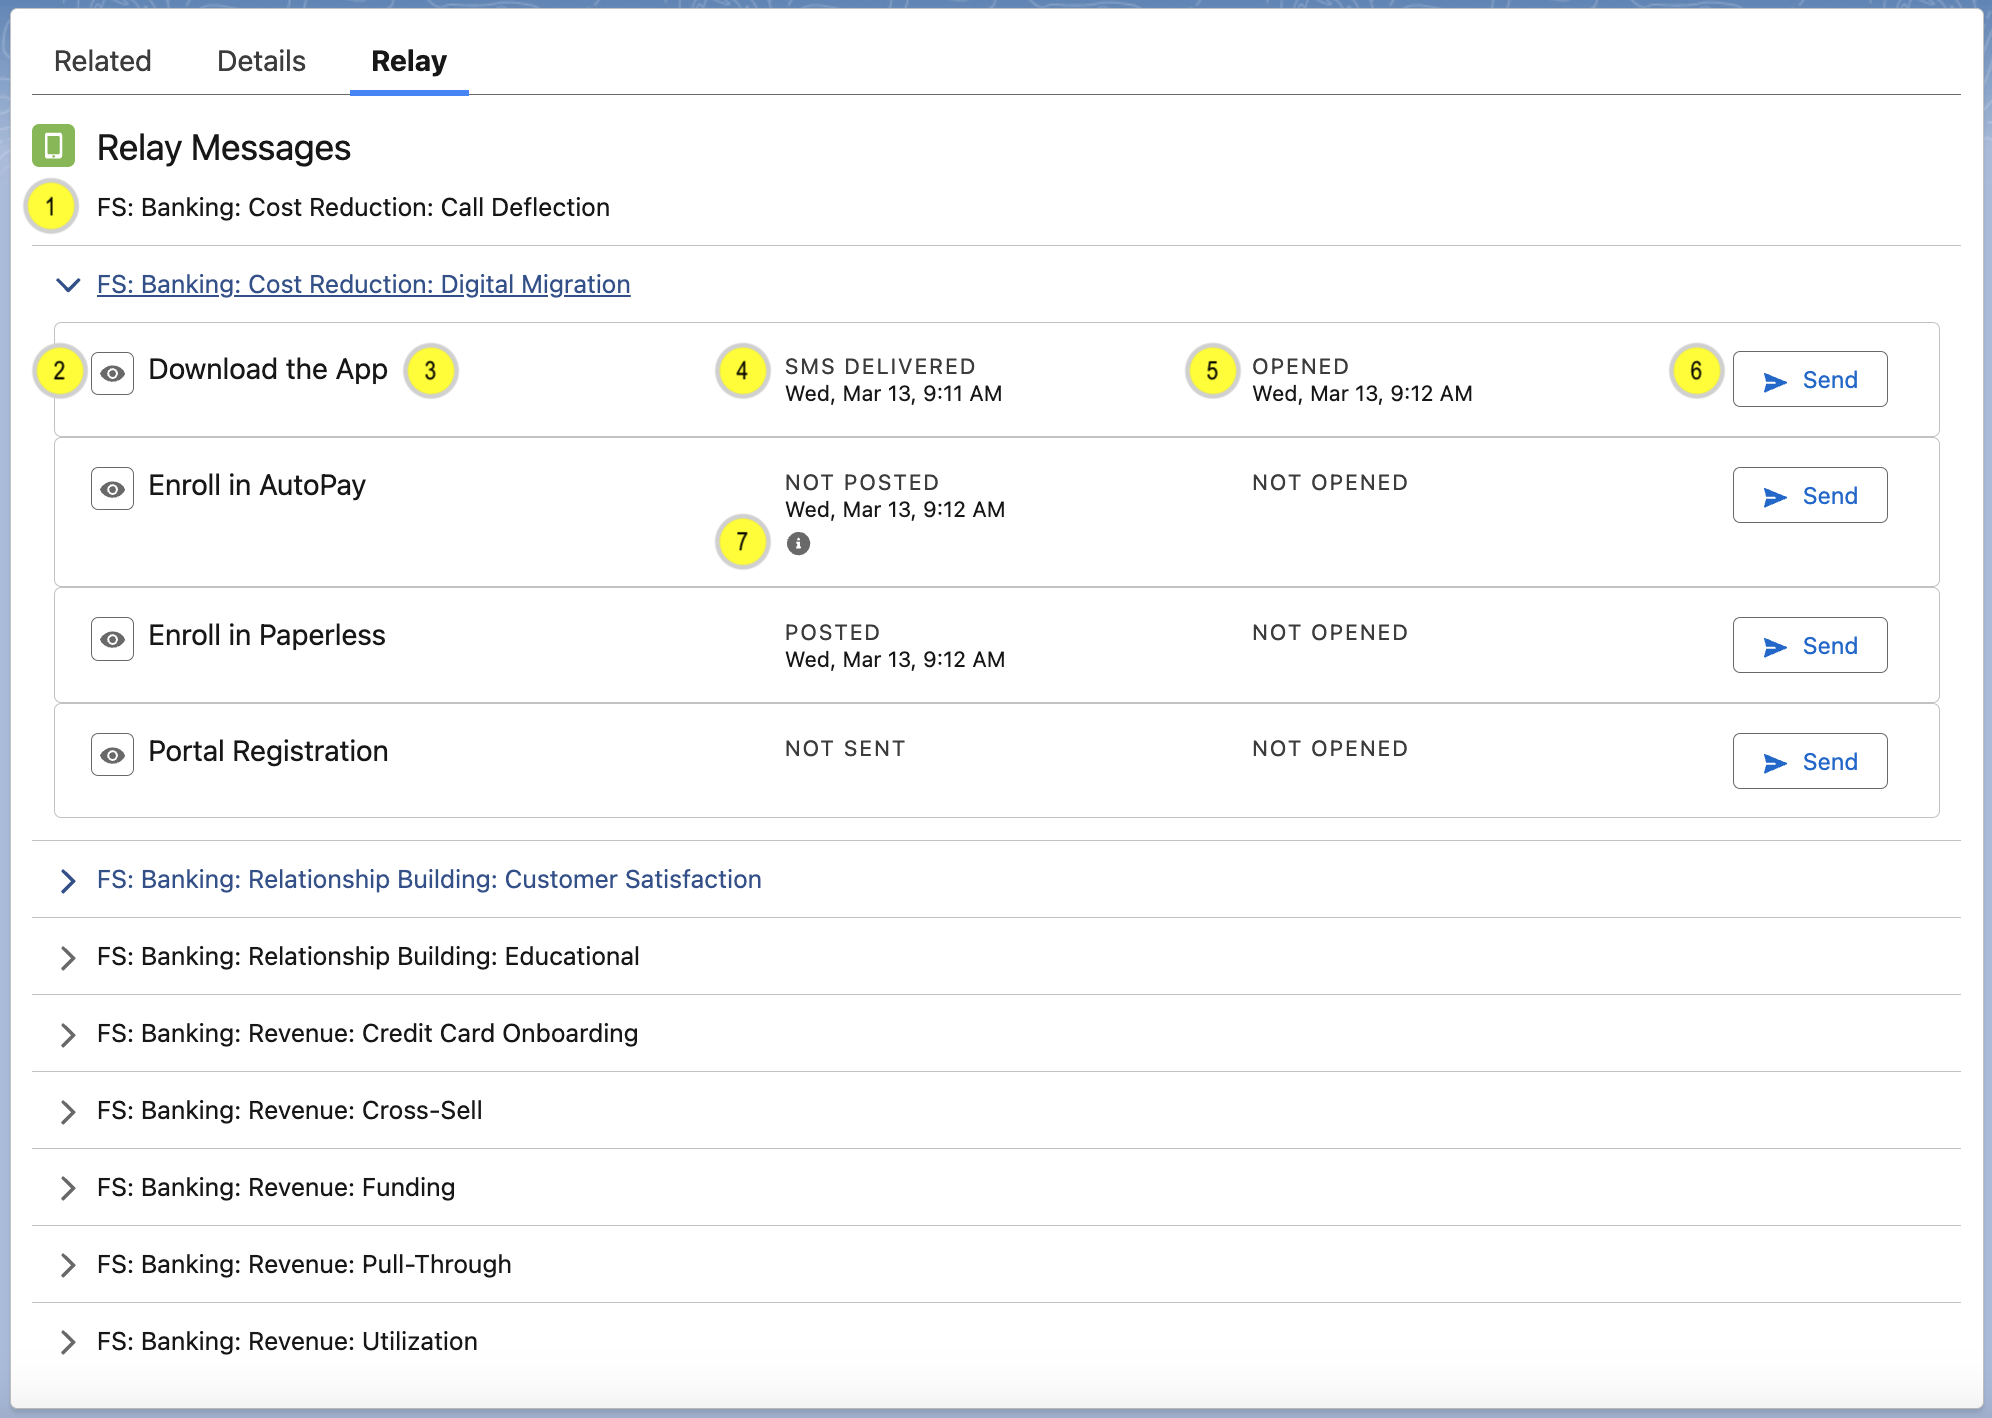
Fig 3. Relay LWC
(Fig. 3-1) - Within the Relay CXB, messages are added to a collection called experiences. Each experience can contain one or more messages. The component displays all of the filtered experiences (see the next article for details on configuring the component). Experiences can be expanded to show the individual messages.
(Fig. 3-2) - This is the message preview icon. Clicking on it will present the agent with a preview of the message content. Currently, this functionality does not include previewing images or videos that might be in the message.
(Fig. 3-3) - This is the description of the message.
(Fig. 3-4) - This section provides the sending status of the message. When sending a message it will go through several status changes including Pending, Posted (or not posted), SMS Delivered (or not delivered). Posted refers to posting the message to the user’s Feed.
(Fig. 3-5) - This section provides the status of when a user has clicked on the SMS to view the message.
(Fig. 3-6) - Clicking the send button will open a confirmation dialog. The confirmation dialog presents to the agent the user’s name, mobile number, and which message will be sent as a final confirmation before sending.
(Fig. 3-7) - If any errors occur during the send process, the error status will be displayed along with an (i) icon. Hovering your cursor over the (i) icon will display a brief description of the error that occurred.
Relay Message Status Values
The Relay message status of sending (Fig. 3-4 )and viewing (Fig. 3-5) are calculated from RelayEvent__c records that have been pushed to your org.
Message Send Status
The table below outlines the RelayEvents__c records that control the message status value (Fig. 3-4).
NOTE
A Relay message does not always have an accompanying SMS notification.
EventType__c | EventSubType__c | Description |
|---|---|---|
message | delivered | The message was delivered (posted) to the user’s Feed. |
message | undelivered | The message failed to be delivered to the user’s Feed. Some common reasons for failures are:
|
notification | delivered | The SMS message was successfully delivered to the mobile device. |
notification | undelivered | The SMS message failed to be delivered to the mobile device. There are many reason why |
notification | not_attempted | The SMS message was not attempted. The most common reasons why an SMS message would not be attempted are:
|
Message Viewed Status
The table below outlines the RelayEvents__c records that control the message viewed status (Fig. 3-5).
EventType__c | EventSubType__c | Description |
|---|---|---|
notification | auth_link_used | The user clicked on the SMS notification. |