Example 6: Save Relay Power-up File Attachment to Salesforce
This example should be used as a reference to understand basic concepts and ideas on integrating with Relay Network. It should not be taken literally as this is how integration to Relay must be done. You should replace your record types, field names, business logic, etc. with those that match your business process and setup.
Example Goals
Whenever a user, in the Relay feed, attaches a file or image in a submitted Relay Power-up form, this flow will retrieve the attachment and store it in Salesforce.
Assumptions
The user’s data is stored in a person account.
The person account has a custom field called RelayCCID__c that uniquely identifies the user.
A Relay Power-up form has been created and sent to a user
Security and Permissions
Record triggered flows always run in system context without sharing, which means they can access all data in the org regardless of user permissions, but still need the "Manage External Callouts" permission to make external calls
Flow Resources
This example does not require any flow resources to be created.
Flow Logic
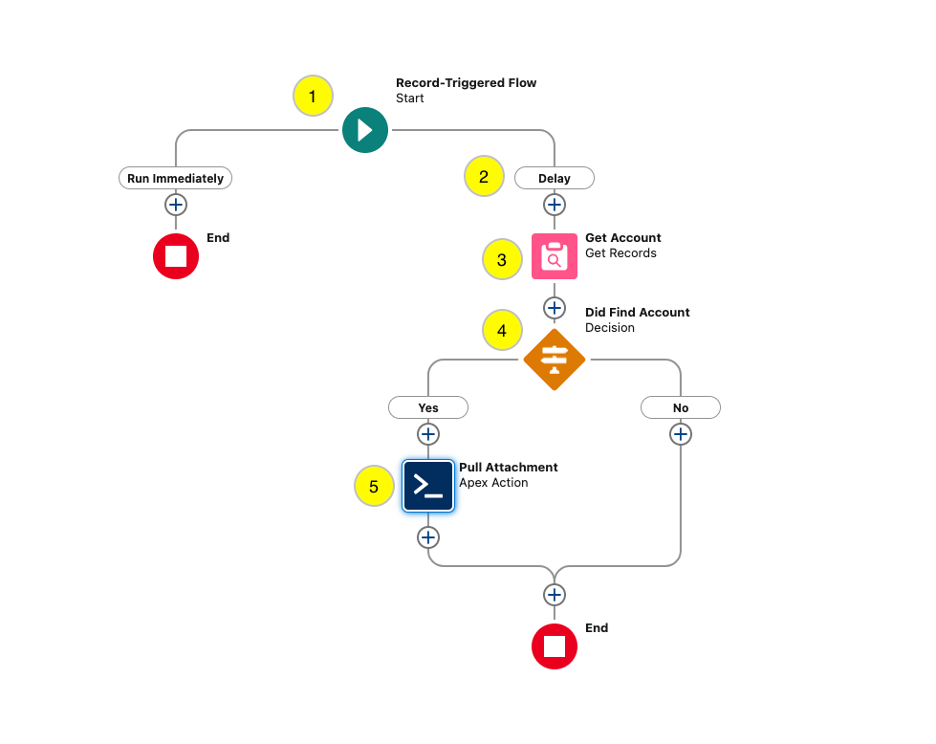
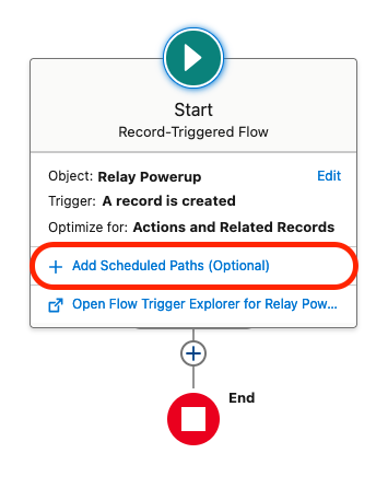
(1) Create a Record-Triggered Flow
Specify the RelayPowerups__c record type
Set Configure Trigger as A record is created
Set the Entry Conditions to meet your specific business requirements. In this example, we will be looking for a specific form submission.
Set Condition Requirements to All Conditions Are Met (AND)
Add a condition: Field = Name; Operator = Equals; Value = “Powerups Data Artifact Available”. Enter the value without the quotes.
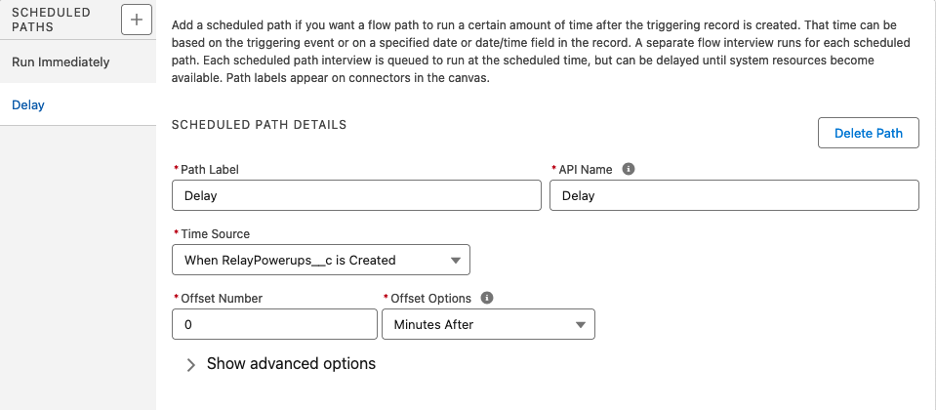
(2) Add a Scheduled Path to the Flow
The RelayPullAttachmentAction action in this flow makes an external callout, which cannot be run immediately in a record-triggered flow. To work around this, we will use a scheduled path to run the action asynchronously.
On the Flow Start element, add a Scheduled Path.
Set the Path Label to Delay
Set the API Name to Delay
Set the Time Source to “When RelayPowerups__c is Created”
Set the Offset Number to 0 (so that it will run asynchronously, as soon as possible)
Set the Offset Options to Minutes After
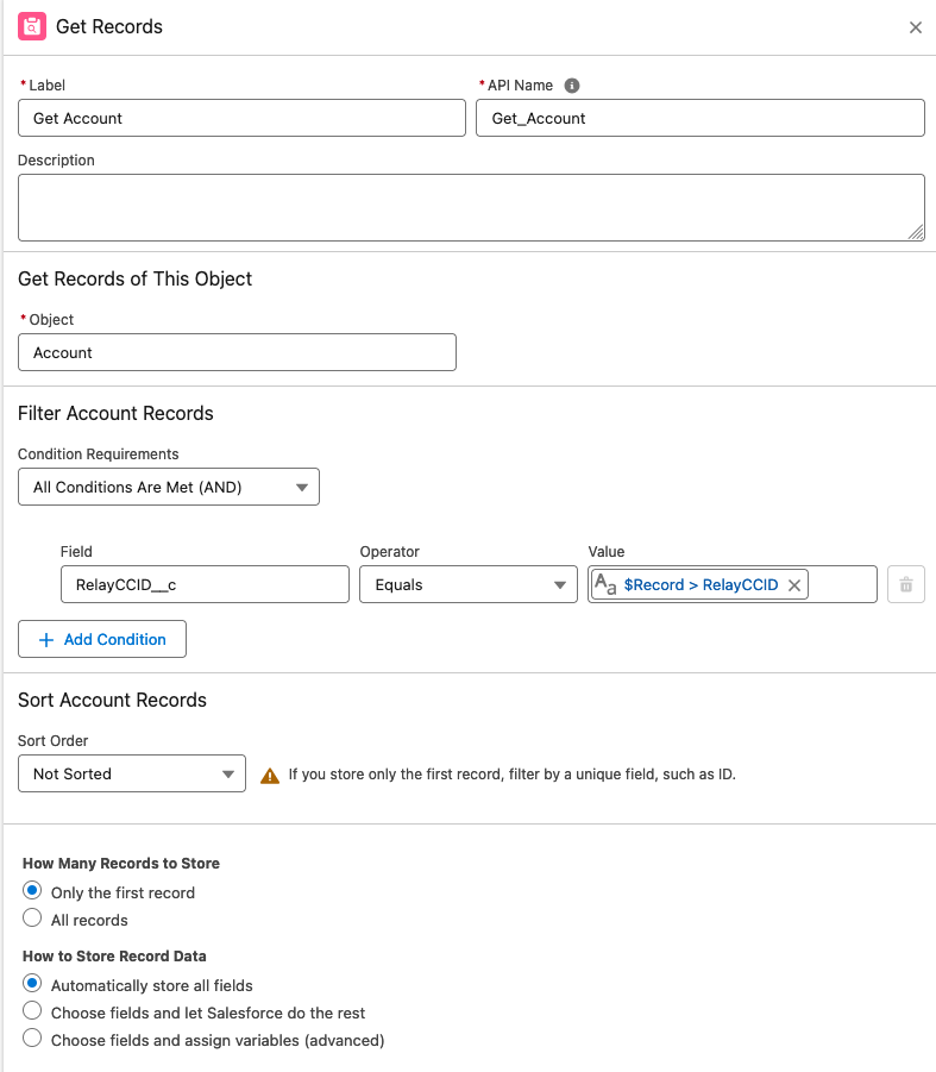
(3) Get the Person Account record
IMPORTANT
This example assume the Person Account object has a custom RelayCCID__c field. You can use another field for the CCID value such as the records ID field. If you decide to use a different field, make sure you update the example flow accordingly and replace any instance of RelayCCID__c with the field you selected.
Add a Get Records element
Set the Object to Account
Set Condition Requirements to All Conditions Are Met (AND)
Set Field to RelayCCID__c; Set Operator to Equals; Set Value to $Record > RelayCCID
Set How Many Records to Store to Only the first record
Set How to Store Record Data to Automatically store all fields
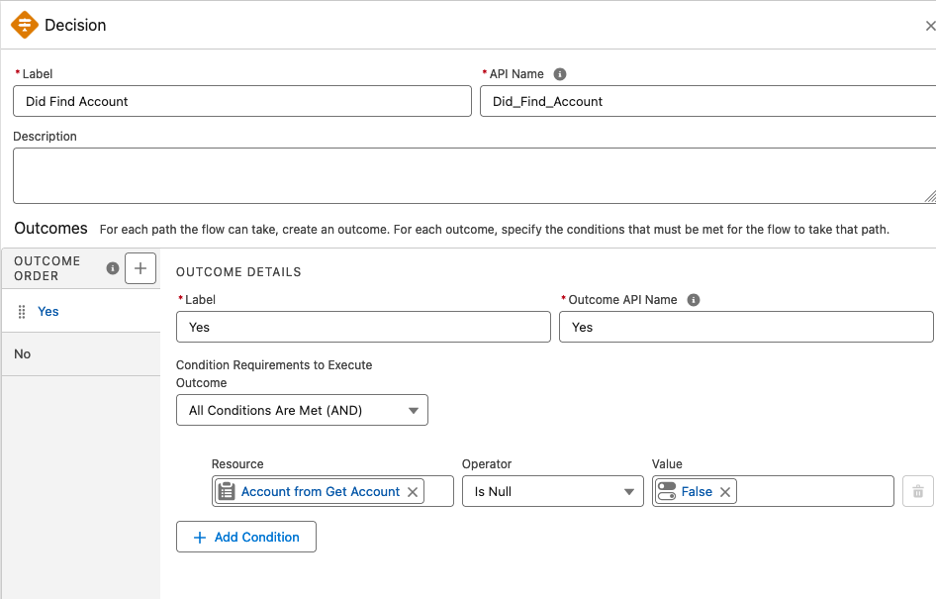
(4) Verify the Record was Retrieved
Add a Decision element
Set Label to Did Find Account
Set API Name to Did_Find_Account
Add a Yes outcome
Set Label toYes
Set Outcome API Name to Yes
Set Condition Requirements to Execute Outcome to All Conditions Are Met (AND)
Set Resource=Account from Get Account; Operator=Is Null; Value=False
Change the default outcome label to No
(5) Add a RelayPullAttachmentAction to the Flow
This Relay action will pull the attachment into your Salesforce org and automatically store the attachment as a File associated with the account record of the ID retrieved in step (2).
Edit the RelayPullAttaachmentAction element properties
Set Label to Pull Attachement
Set API Name to Pull_Attachment
Set RelayPowerups__c event to the event record that triggered the flow; Triggering RelayPowerups__c
Set Description to Relay Powerup Form
Set Linked Entity Id to Account from Get Account → Account ID.
Set Title to the attachment file name. e.g. Insurance Card.